In this guide, we explore the various LinkedIn ad types before giving a step-by-step guide on how to run ads on LinkedIn.
For each ad format mentioned, we’ve also included links to resources detailing best practices and technical specs—like ad size limitations.
Types of LinkedIn Ads
There are four main types of ads used in LinkedIn marketing—Sponsored Content, Sponsored Messaging, Lead Gen Forms, and Text and Dynamic ads.
Let’s take a closer look with some LinkedIn ad examples.
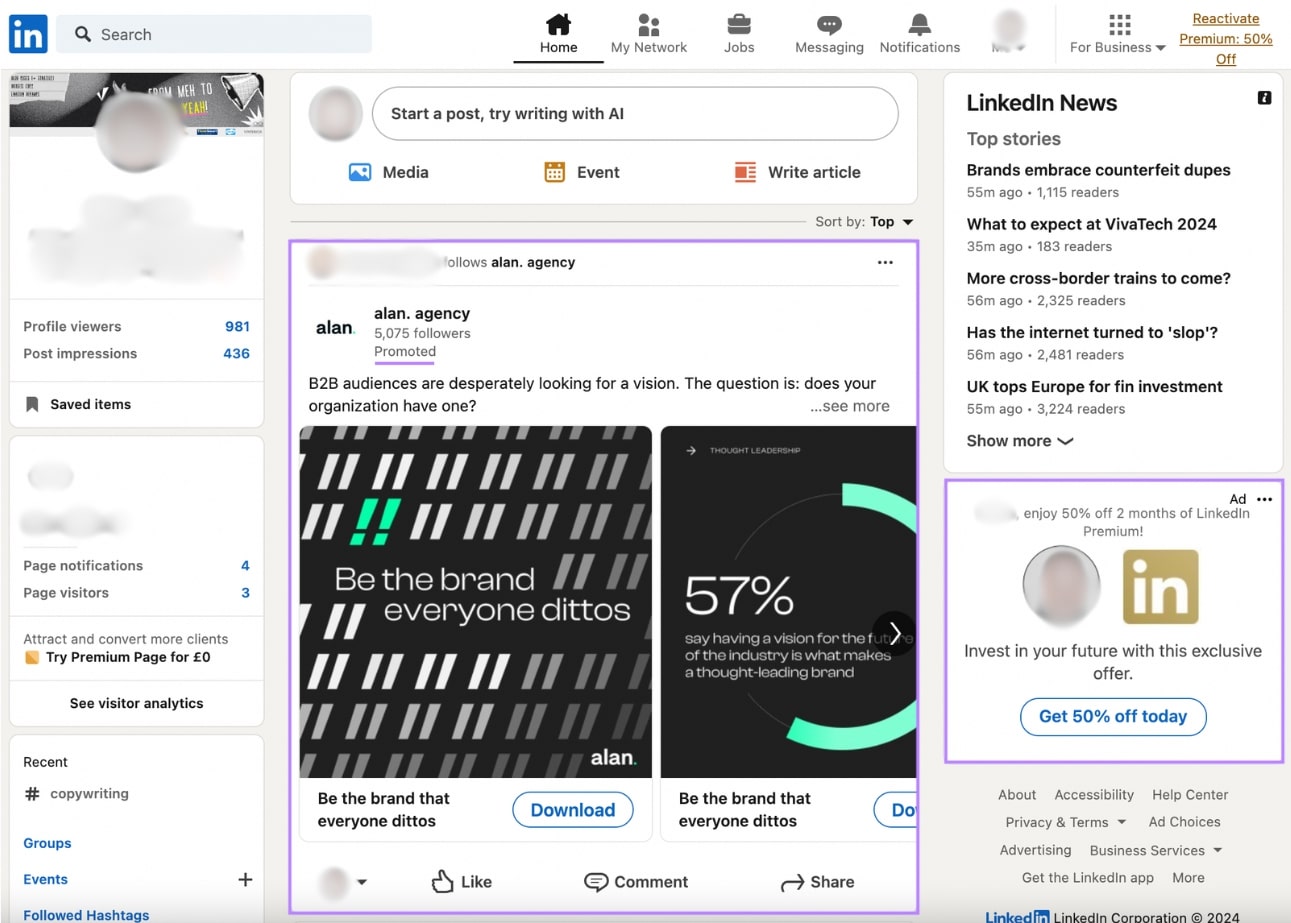
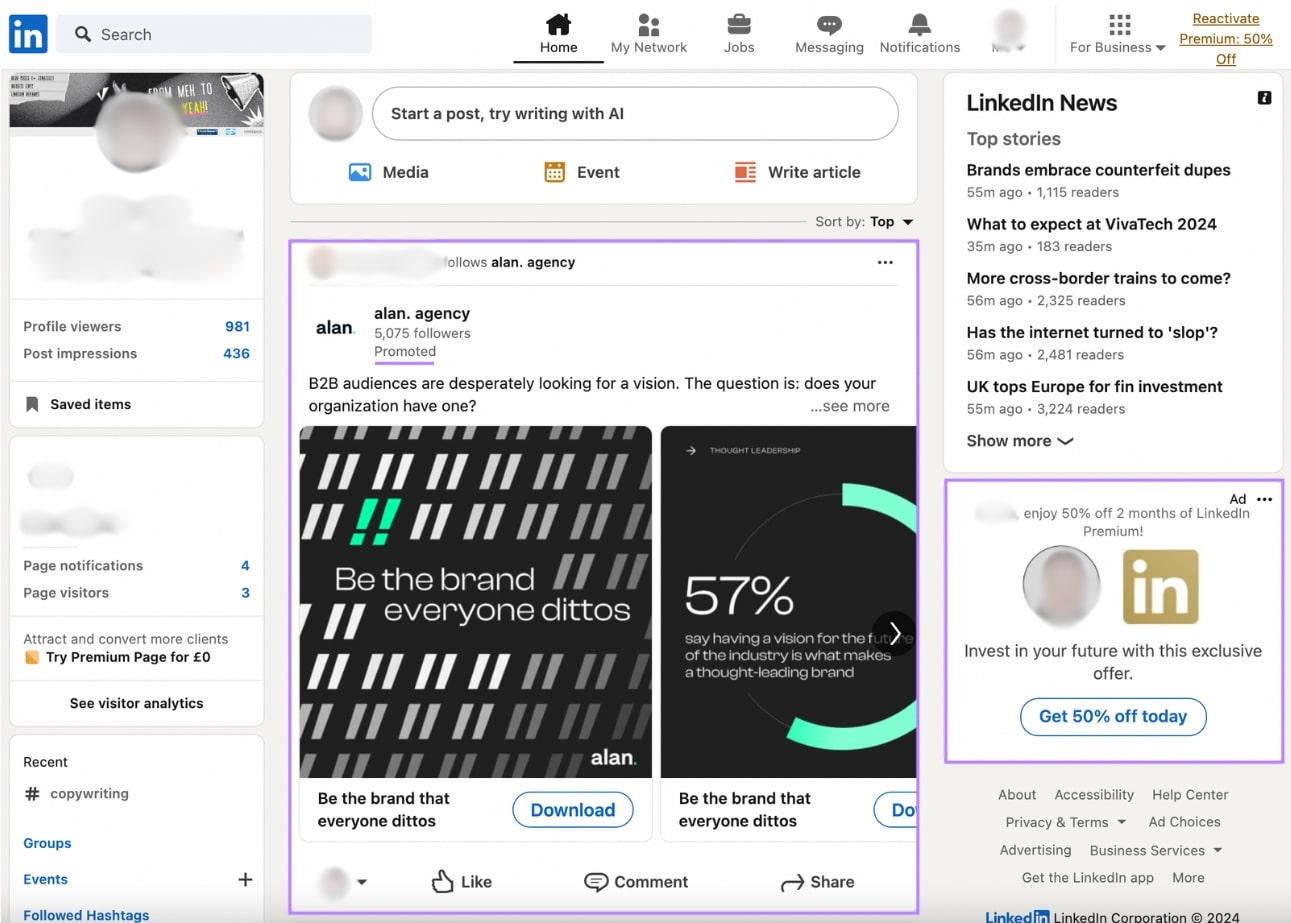
Sponsored Content refers to native ads that appear in the target audience’s LinkedIn feed. These ads resemble the feed’s other user-generated content, with the exception that all Sponsored Content is tagged with a “Promoted” label.
Sponsored Content encompasses many different LinkedIn ad formats, including single image ads, video ads, event ads, carousel ads, document ads, click-to-message ads, and thought-leader ads.
Sponsored Content ads can be combined with Lead Gen Forms to capture information from qualified leads.
Single Image Ads
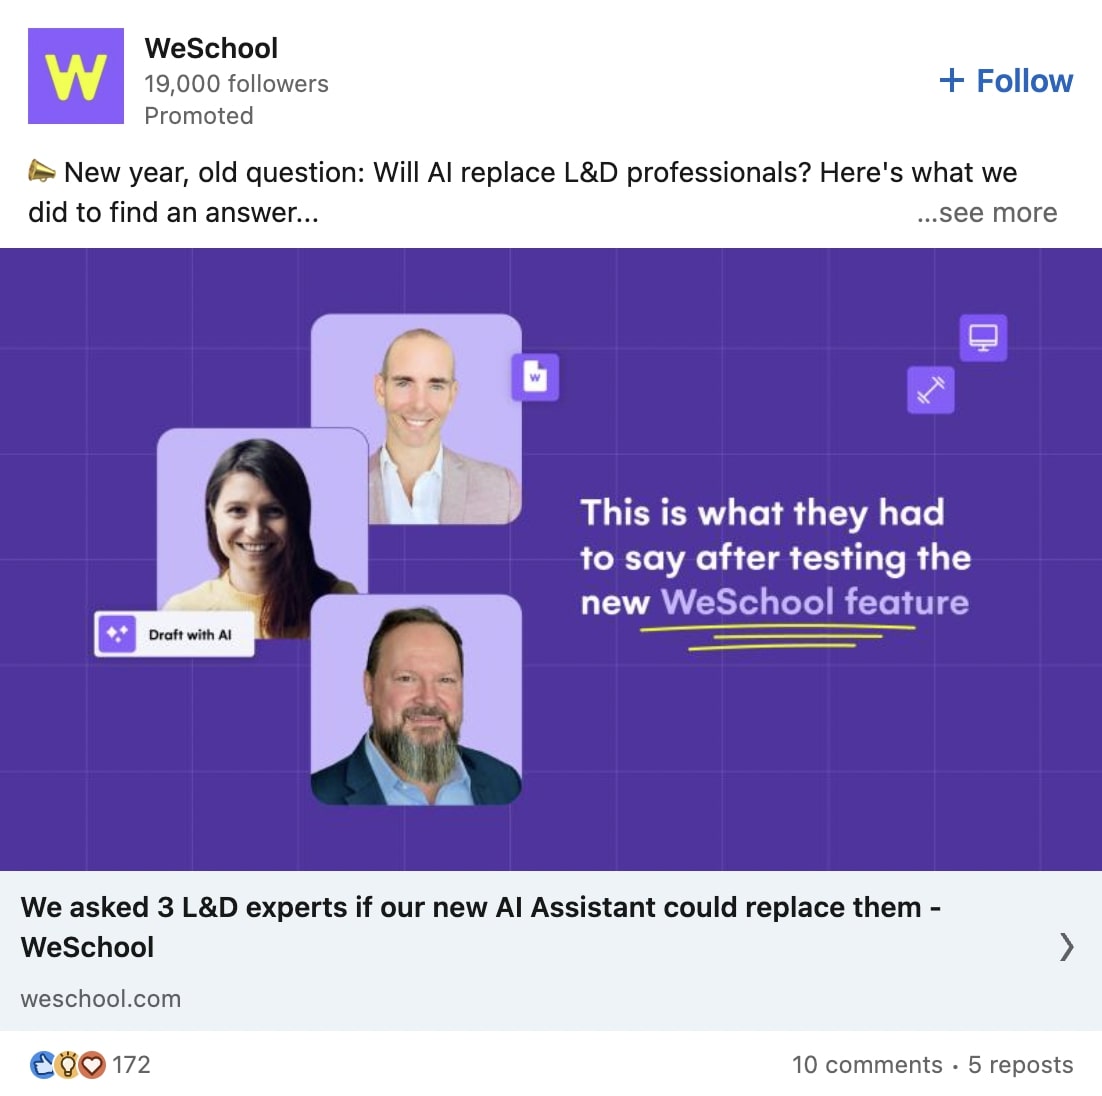
Single image ads are simple, sponsored content adverts that appear in your target audience’s LinkedIn feed as native ads. They resemble normal LinkedIn posts but are flagged with the “Promoted” flair to distinguish them from non-sponsored content.
These ads feature one eye-catching image and a short message. They typically have a call to action (CTA) and a link, prompting viewers to perform a desired action. Like visiting a website.
Single image ads are suitable for a range of campaign objectives, including:
- Brand awareness
- Engagement
- Lead generation
- Website visits
- Website conversions
- Job applications
Further reading: LinkedIn single image ads specs
Click-to-Message Ads
Click-to-message ads are a type of single image ad containing a “Send Message” CTA. When a viewer clicks the CTA button beneath the image, they’re redirected to a new LinkedIn Messaging conversation with the advertiser.
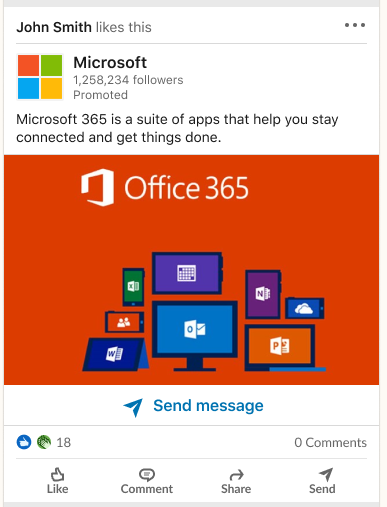
Click-to-message ads make it easy for your audience to get in touch with you. Enabling direct messaging through a single click removes friction from the process of initiating contact. This makes it more likely that the viewer will complete the action.
Further reading: LinkedIn click-to-message ads specs
Carousel Ads
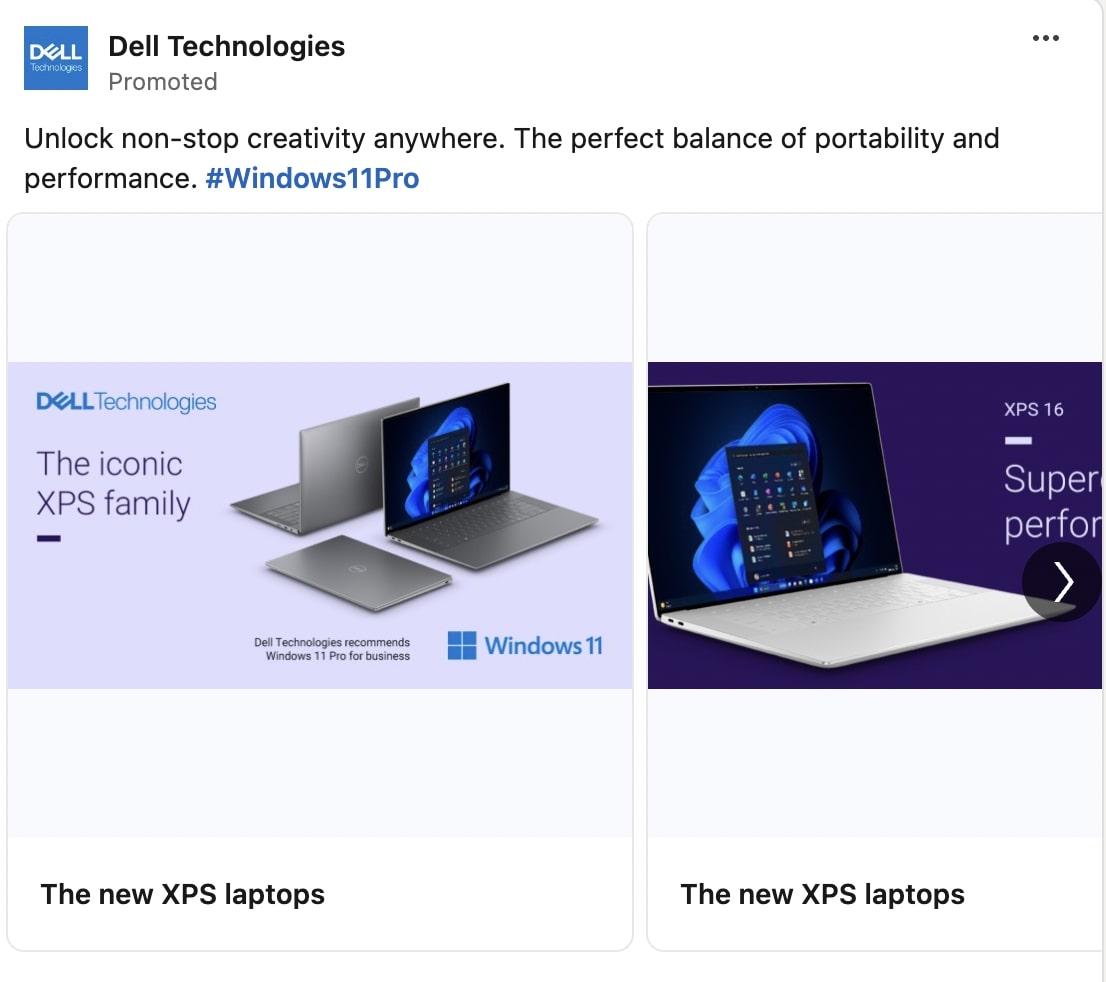
LinkedIn carousel ads showcase multiple images as a pageable series of cards, each with its own individual captions (and links).
The swipeable format allows advertisers to tell engaging stories that unfold as the viewer pages through the images. Carousel ads are also great for showcasing a variety of different services, product features, or offerings.
Carousel ads on LinkedIn can be used for a range of campaign objectives, including:
- Brand awareness
- Engagement
- Lead generation
- Website visits
- Website conversions
Further reading: LinkedIn carousel ads specs
Video Ads
Much like single image ads, video ads are a sponsored content format served in the LinkedIn feed as native content.
Video ads can be created from scratch in the Campaign Manager, or you can choose to sponsor existing videos from your LinkedIn page.
Video ads can be paired with the following campaign objectives:
- Brand awareness
- Website visits
- Engagement
- Video views
- Website conversions
- Lead generation

Further reading: LinkedIn video ads specs
Document Ads
Document ads are a native ad format that uses documents such as ebooks, case studies, and whitepapers to build brand awareness, drive engagement, and generate leads.
Document ads can be ungated, freely accessible content members can read in their newsfeeds. Or, they can be gated documents with a Lead Gen Form to collect information from interested readers.
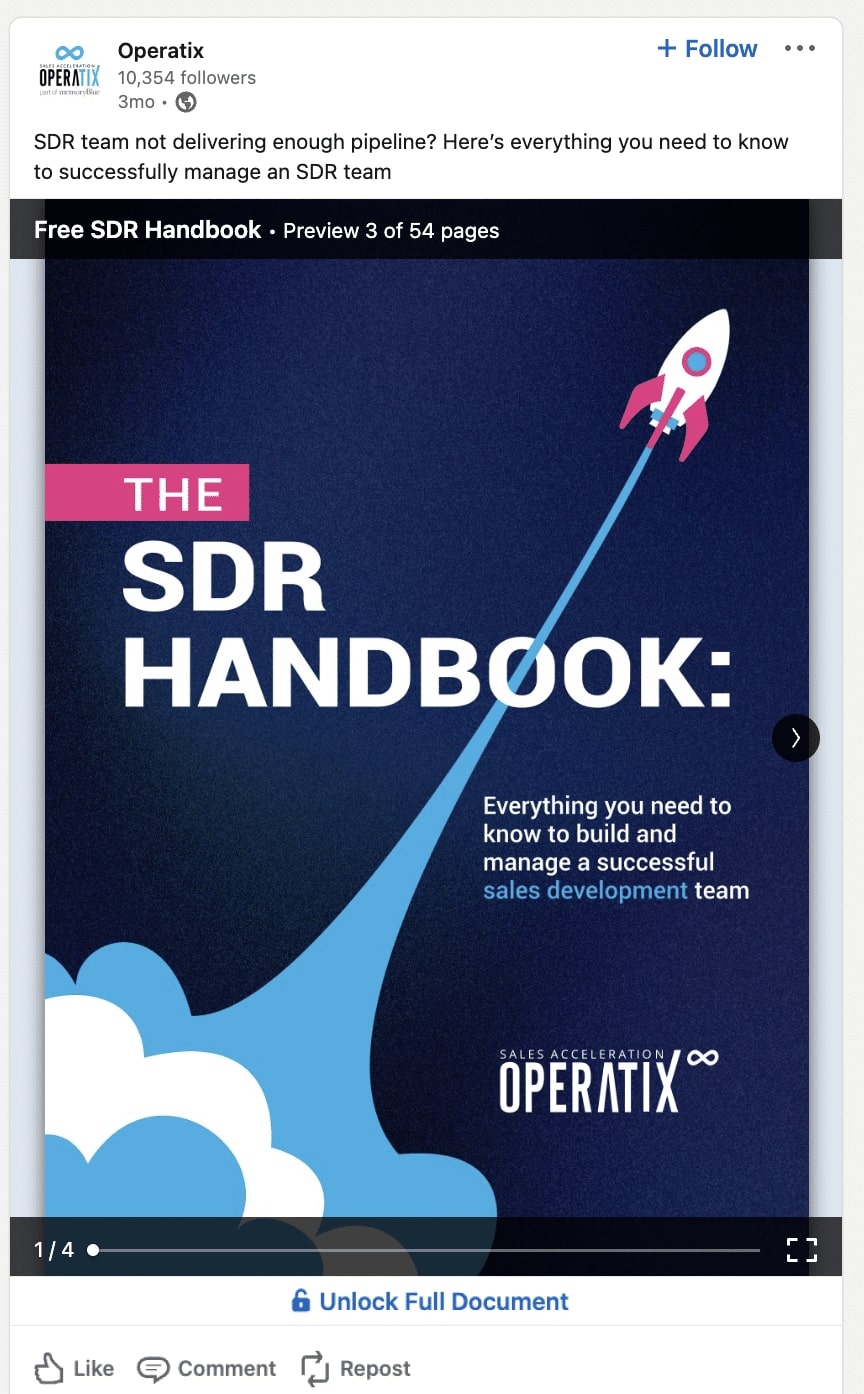
Image Source: Impactable
Further reading: LinkedIn document ads specs
Event Ads
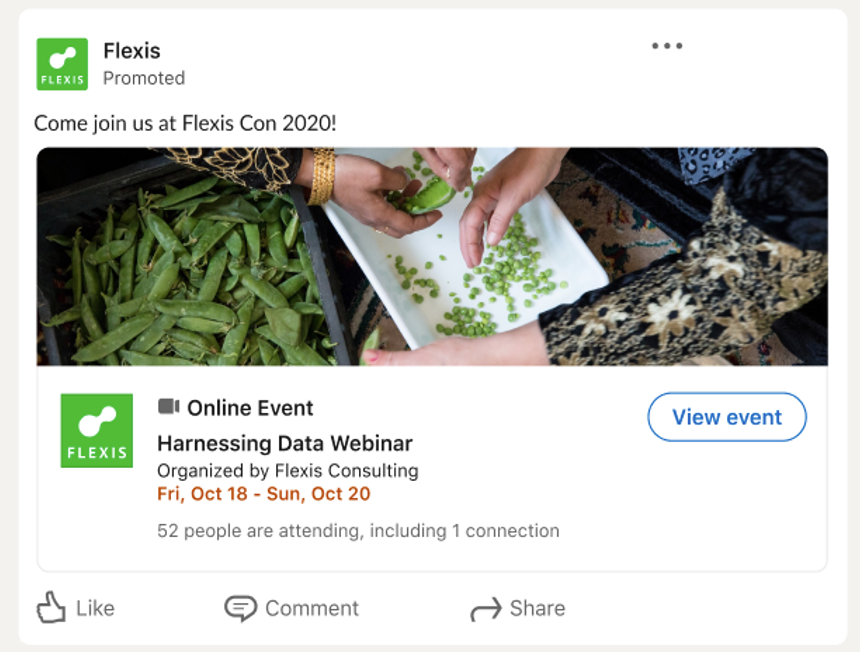
Event ads are native ads used to promote LinkedIn Events landing pages. These ads are served in the LinkedIn feed as sponsored content.
Each event ad campaign is linked to a native landing page with a unique URL.
Event ads are a suitable format for the following campaign objectives:
- Brand awareness
- Website visits
- Engagement
Further reading: LinkedIn event ads specs
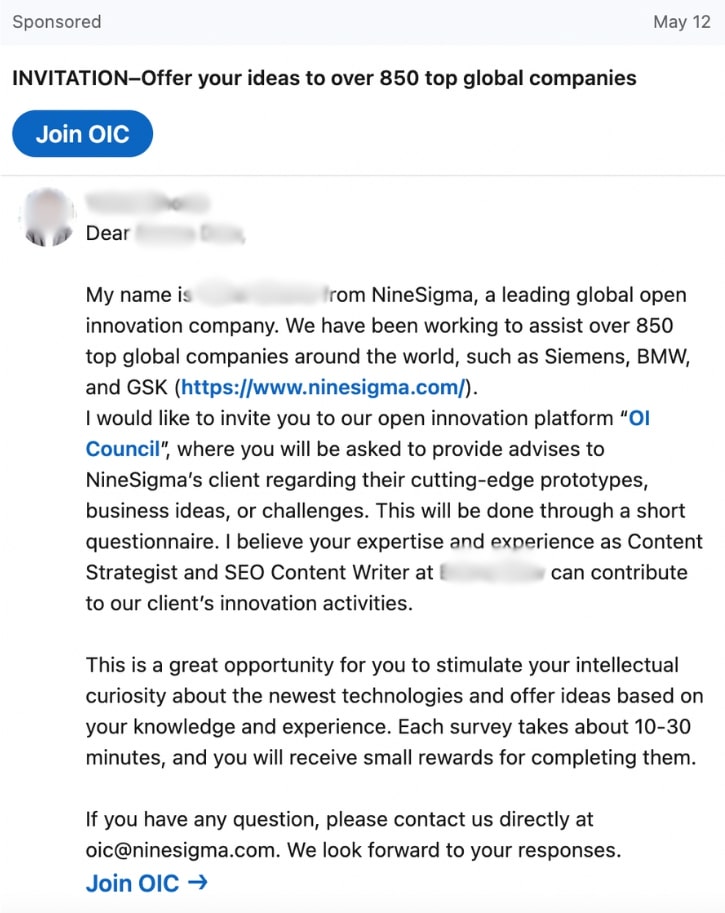
Sponsored messaging refers to ads that take the form of direct messages delivered to the targeted member’s LinkedIn Messaging inbox. These ads are available in two formats—LinkedIn message ads and conversation ads.
LinkedIn Message Ads
LinkedIn message ads are email-style direct messages featuring a single CTA and link.
Conversation Ads
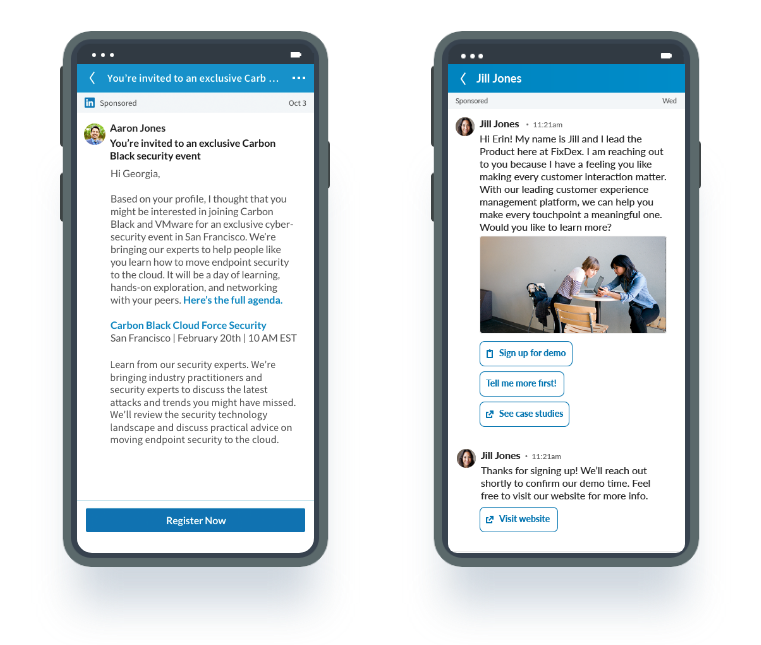
Conversation ads are similar to message ads, except they allow advertisers to add multiple CTAs for audience members to choose from.
This lets advertisers include links to several different landing pages and include Lead Gen Forms to collect information from qualified leads.
Lead Gen Forms
Lead Gen Forms aren’t an ad type so much as an add-on to help advertisers capture leads. LinkedIn’s Lead Gen Forms come with certain fields pre-filled from the member’s profile data.
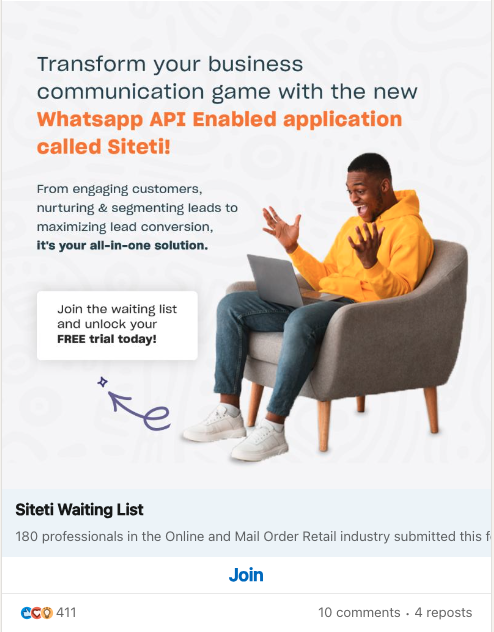
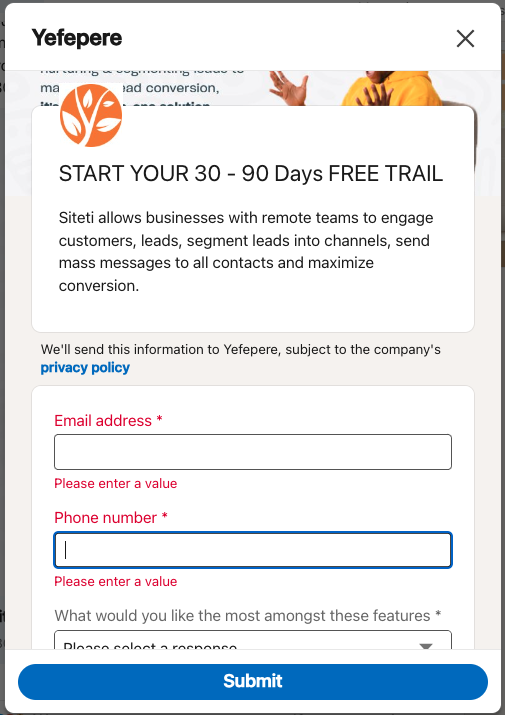
Further reading: LinkedIn Lead Gen Forms specs
Text and Dynamic Ads
Text Ads
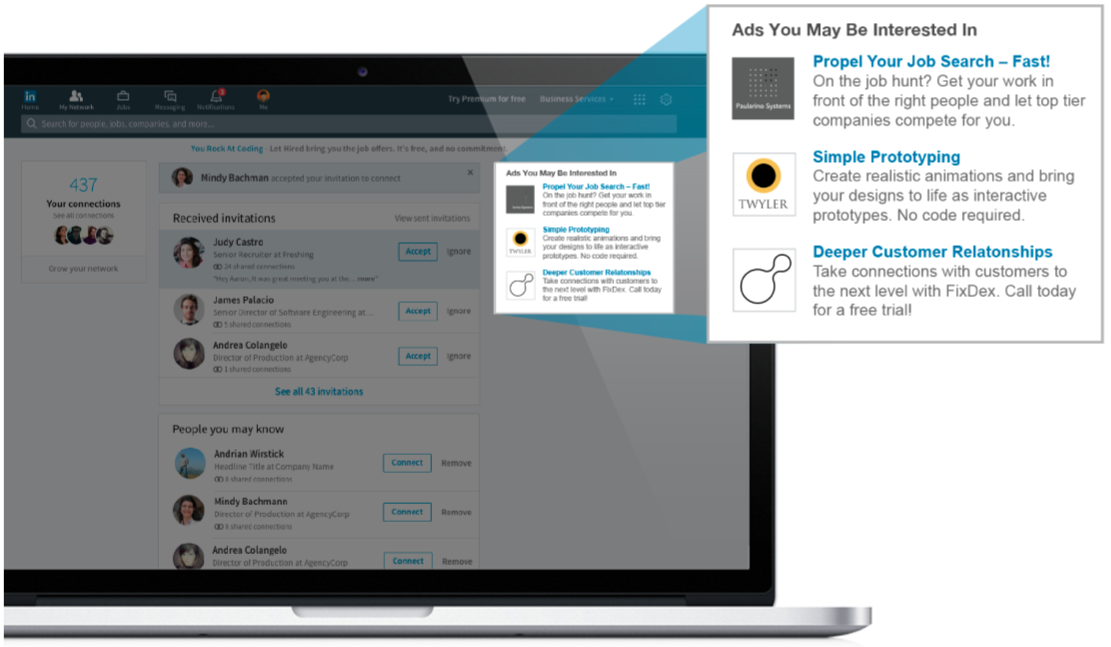
Text ads are simple, text-based desktop ads displayed at the top or to the right of the LinkedIn feed. These ads can be either cost per click (CPC) or cost per 1,000 impressions (CPM) formats.
Dynamic Ads
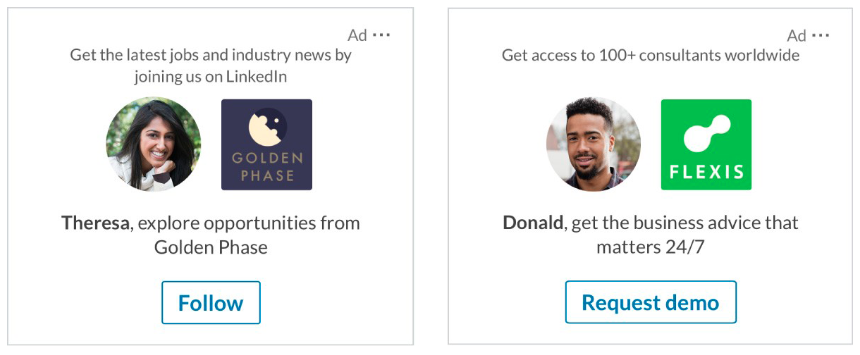
Dynamic ads are personalized adverts customized to individual audience members using their LinkedIn profile data.
These ads occur throughout the desktop LinkedIn experience and may feature data such as the audience member’s name, profile photo, and employment information.
Dynamic ad formats include LinkedIn follower ads, spotlight ads, and jobs ads.
Follower Ads
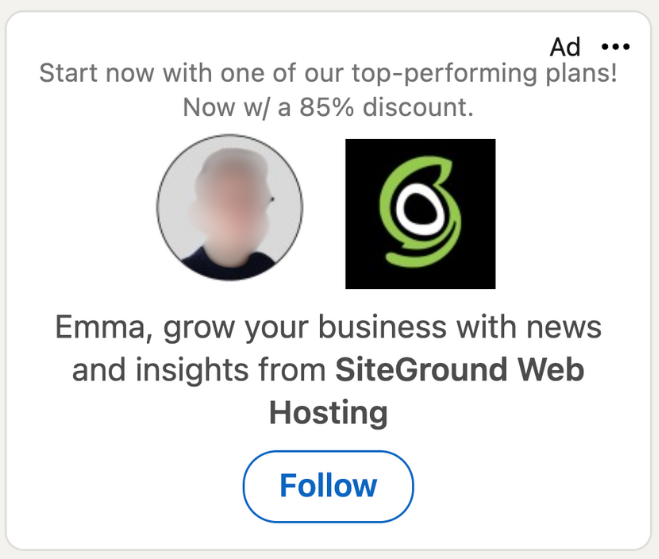
Follower ads are a type of dynamic desktop ad that encourages audience members to follow your Page or Showcase Page. Like other dynamic ads, Follower Ads are personalized to the viewer based on their profile data.
Follower ads can be used with these campaign objectives:
- Brand awareness
- Engagement
Follower ads automatically feature a “Follow” button.
Further reading: LinkedIn follower ads specs
Jobs Ads
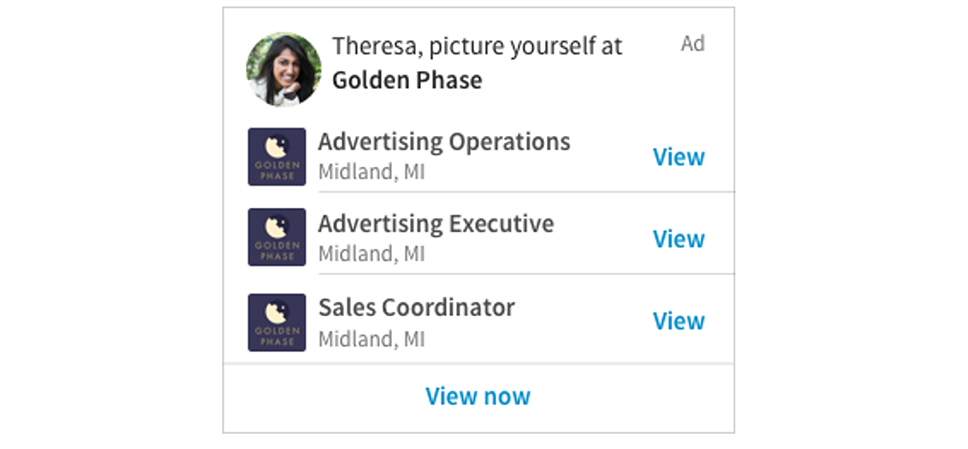
LinkedIn jobs ads are dynamic ads served to relevant talent based on the skills and work experience listed on profile pages. As dynamic ads, jobs ads are also personalized to target audience members using their profile data, such as their name, skills, and profile image.
Further reading: LinkedIn jobs ads specs
Spotlight Ads
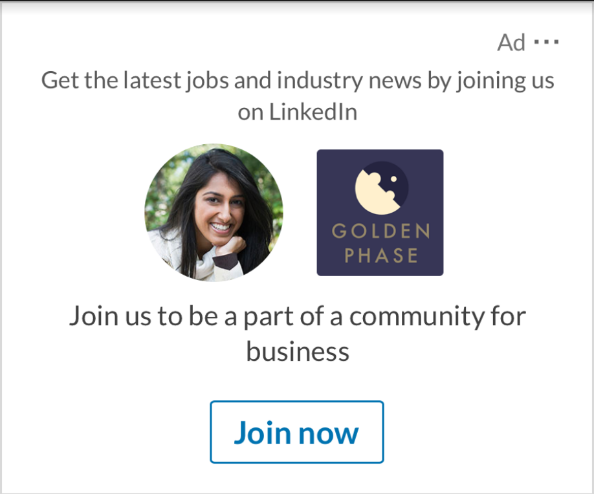
Spotlight ads are a type of dynamic desktop ad personalized with the audience member’s profile data, such as their name, profile photo, job title, and company information.
Clicking on a spotlight ad redirects the audience member to the linked landing page or website.
Spotlight ads on LinkedIn can be used for various campaign objectives, including:
- Brand awareness
- Website visits
- Job applicants
Further reading: LinkedIn spotlight ads specs
How Much Do LinkedIn Ads Cost?
Minimum Bid:
- Cost per click (CPC): $2.00
- Cost per 1,000 impressions (CPM): $2.00
Minimum Daily Spend:
- CPC: $10.00
- CPM: $10.00
For new campaigns, LinkedIn recommends that new advertisers budget a minimum starting spend of $25 and existing advertisers budget $50-$100.
How to Create LinkedIn Ads
1. Set Up a LinkedIn Campaign Manager Account
Start by creating a free LinkedIn Campaign Manager account.
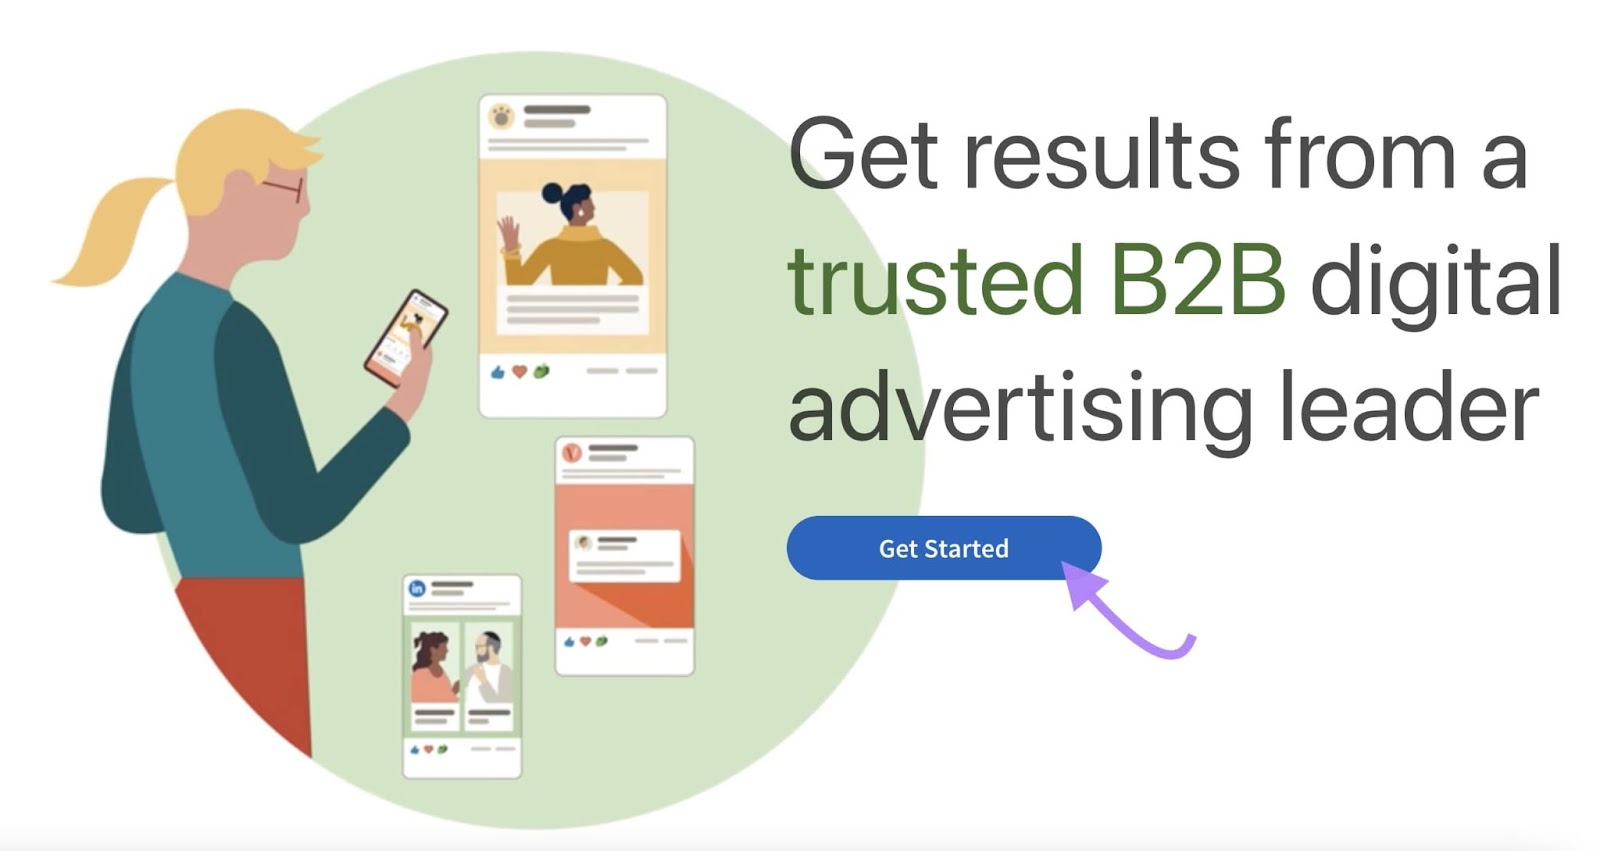
To do this, simply click “Get Started” on LinkedIn’s Marketing Solutions page.
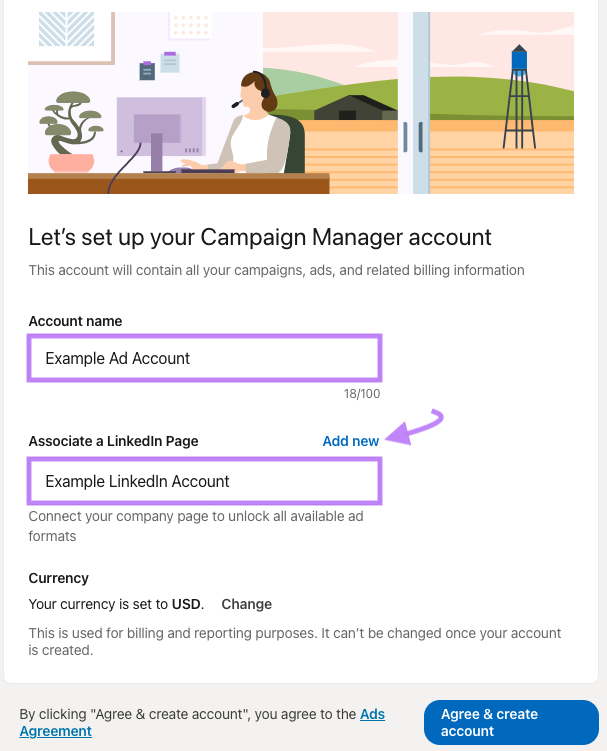
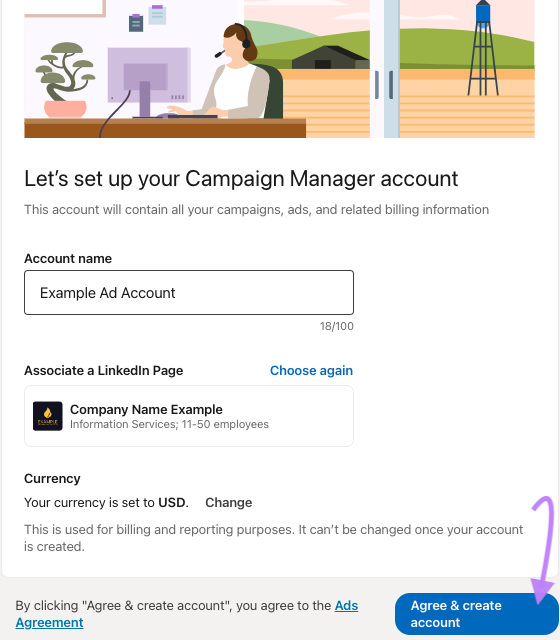
Name your account and link it to an existing LinkedIn page. Or, set up a new LinkedIn page by clicking “Add new.” (Skip ahead if your LinkedIn Page is already set up.)
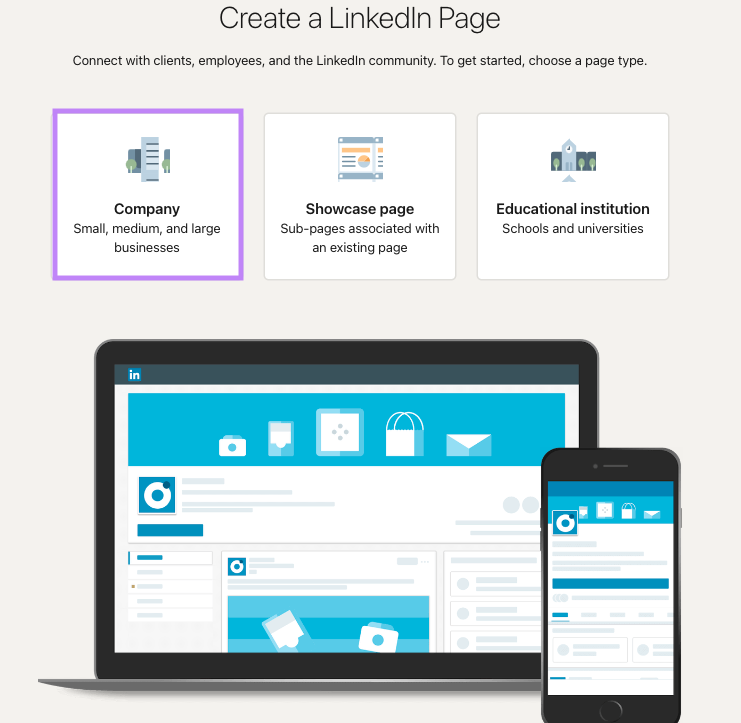
Choose between “Company,” “Showcase page,” and “Educational Institution.”
For this example, we’ve selected “Company.”
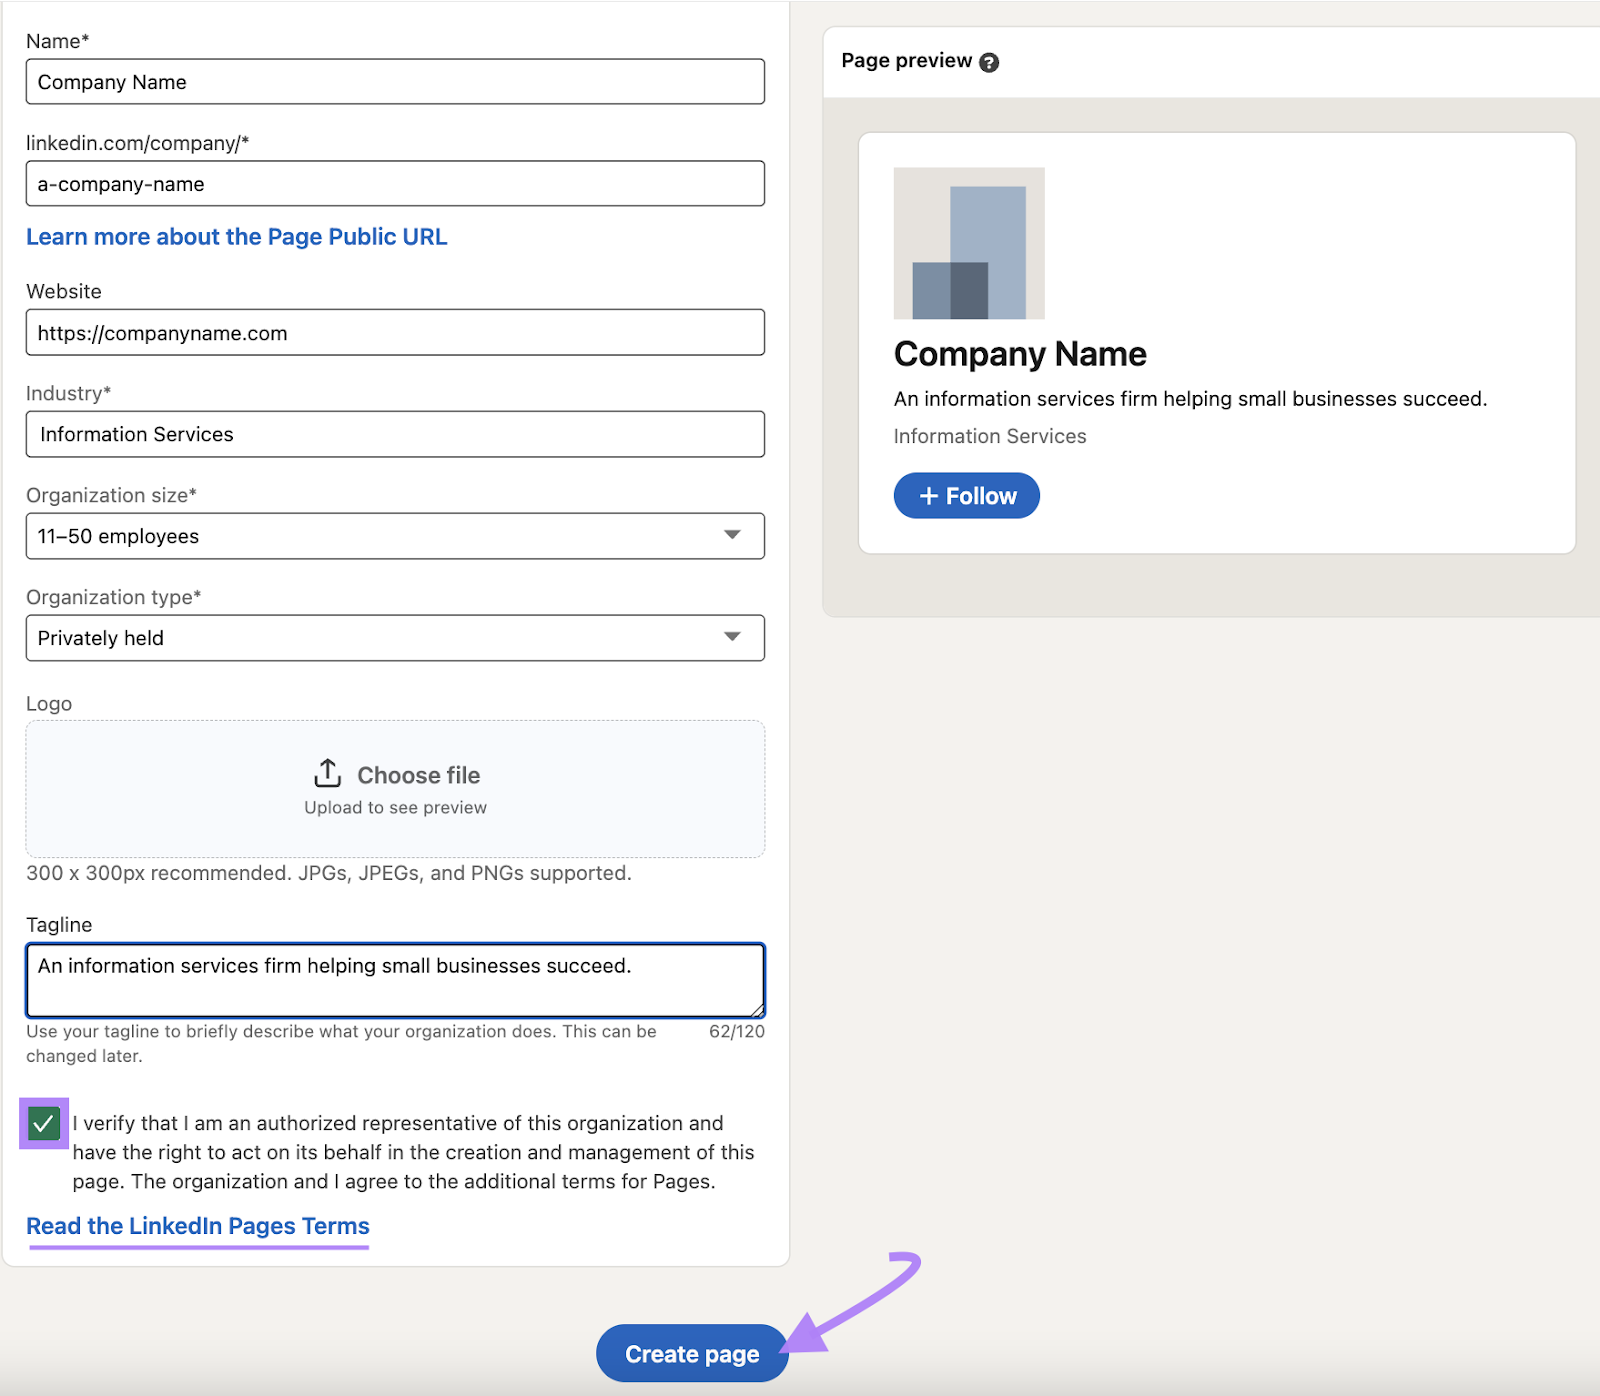
Complete the form provided. Don’t worry about things like the logo or tagline too much—you can update this later.
Once you’ve filled out all the fields, check the box verifying you have the authority to create this LinkedIn page. Optionally, read the terms and conditions and click “Create Page.”
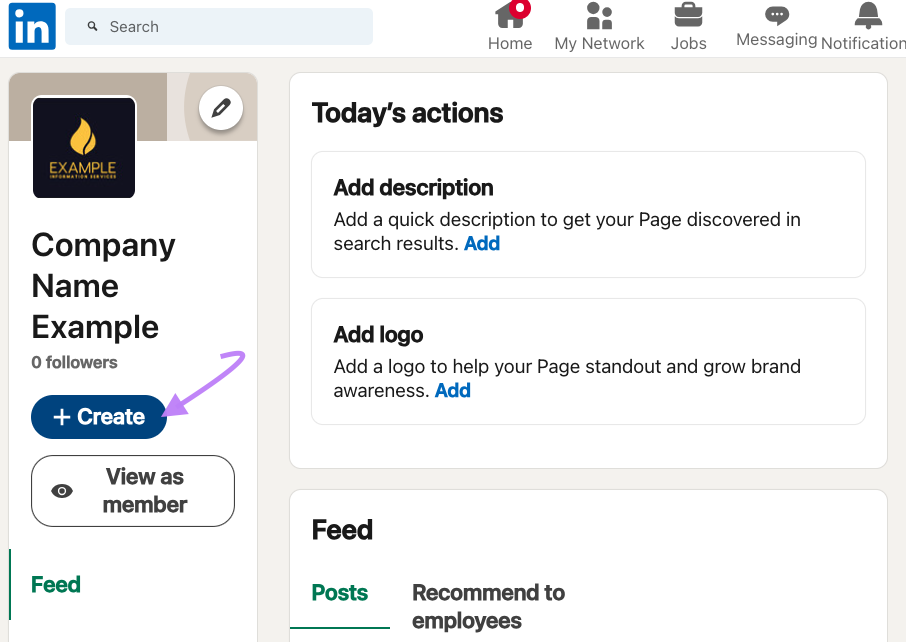
You’ll be redirected to your brand-new page.
Before launching a campaign, it’s a good idea to populate your company page with information.
In the future, you’ll be able to navigate to the Campaign Manager by clicking the “+ Create” button and selecting “Create an Ad” from the menu. For now, let’s finish setting up your Campaign Manager account.
With your new page created, you can copy the page’s URL and paste it in the “Associate a LinkedIn Page” field. Or, start typing your page’s name and select it from the options presented.
Next, choose your billing currency (it’s set to USD by default).
Then, click “Agree & create account.”
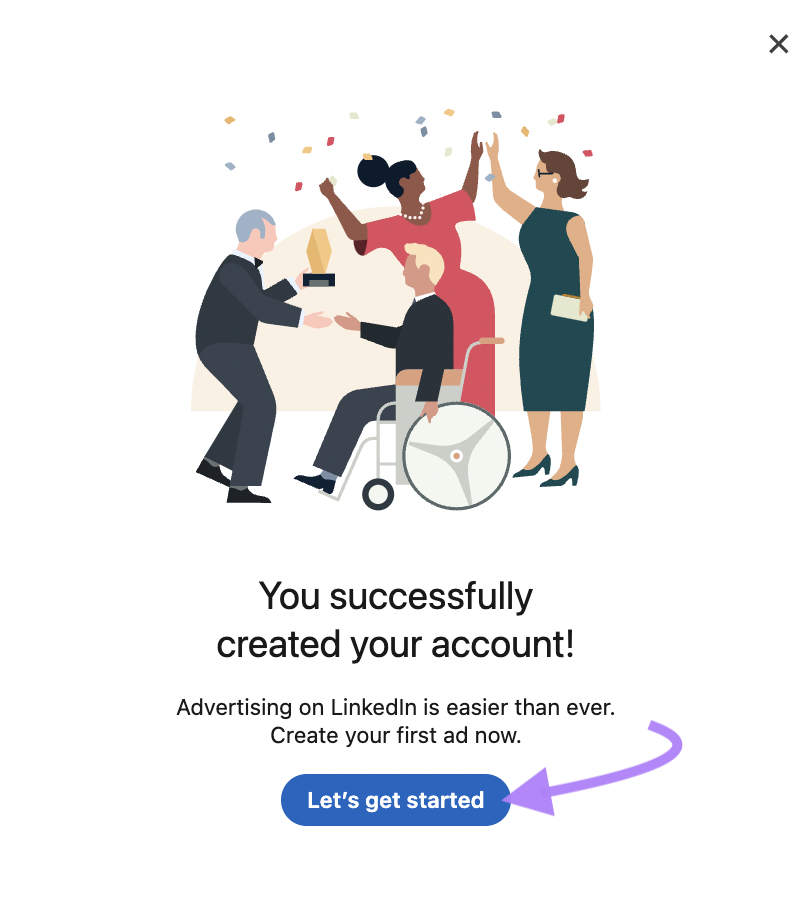
If your account was successfully created, a pop-up will appear.
Click “Let’s get started” to open the Campaign Manager.
2. Create a New Campaign
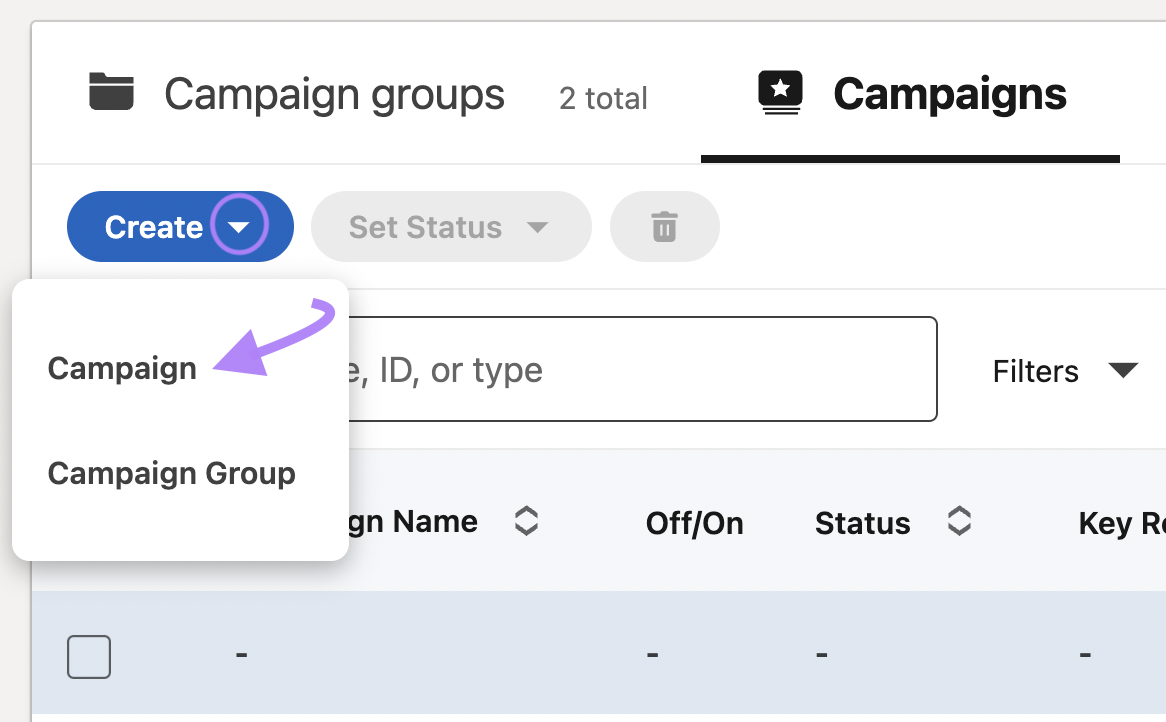
Once in Campaign Manager, click “Create” and select “Campaign.” This will take you to the campaign creation page.
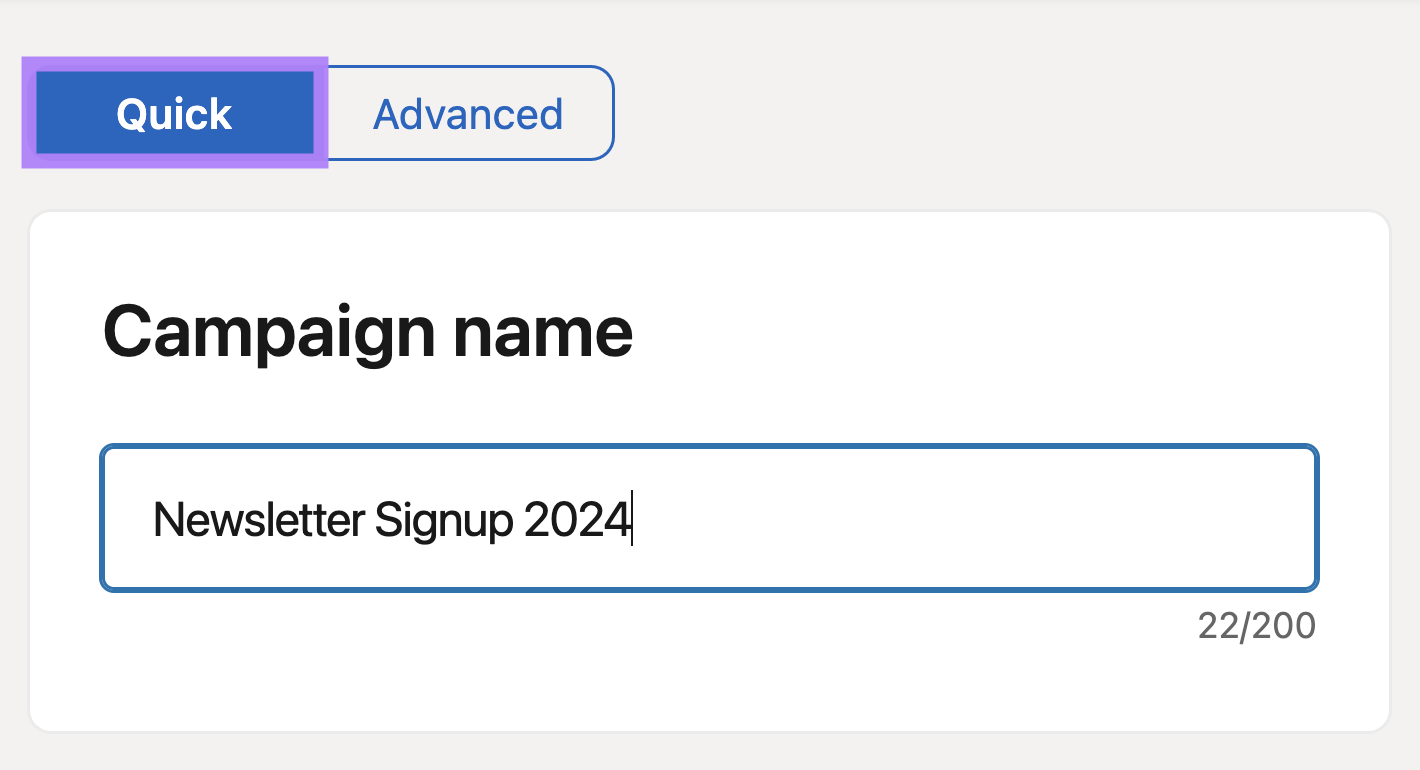
Start by naming your campaign and choosing between the “Quick” or “Advanced” campaign types.
In this example, we’re going with “Quick.”
3. Set an Objective for Your Campaign
Next, select your campaign’s objective.
Select “Brand awareness” if your goal is to reach more people with your ad. Choose “Website visits” if your aim is to get more people to click through to your landing page.
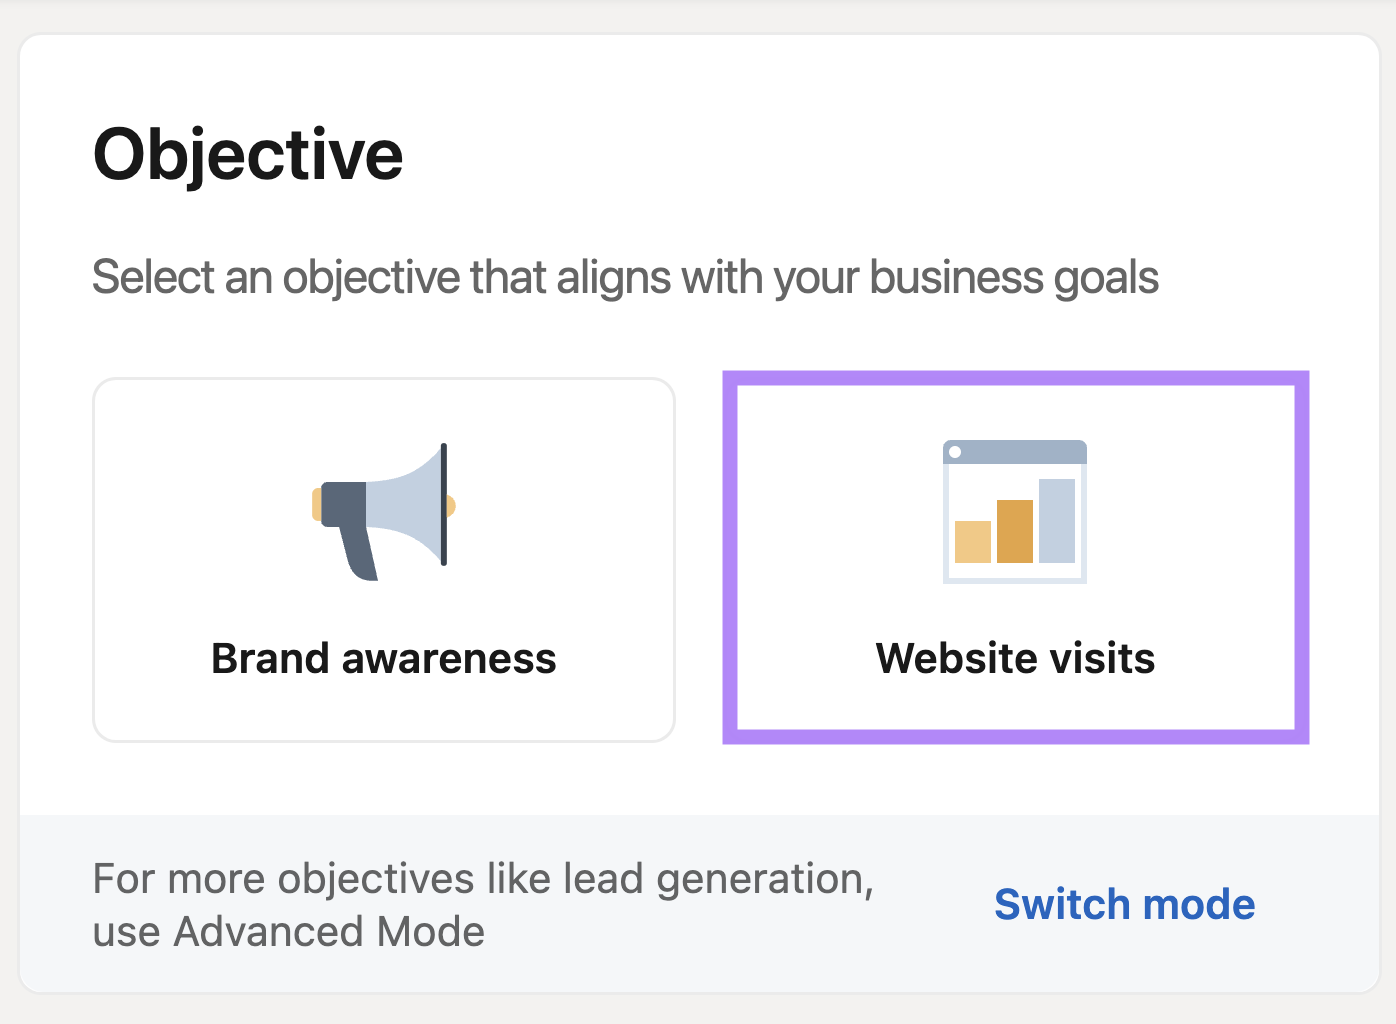
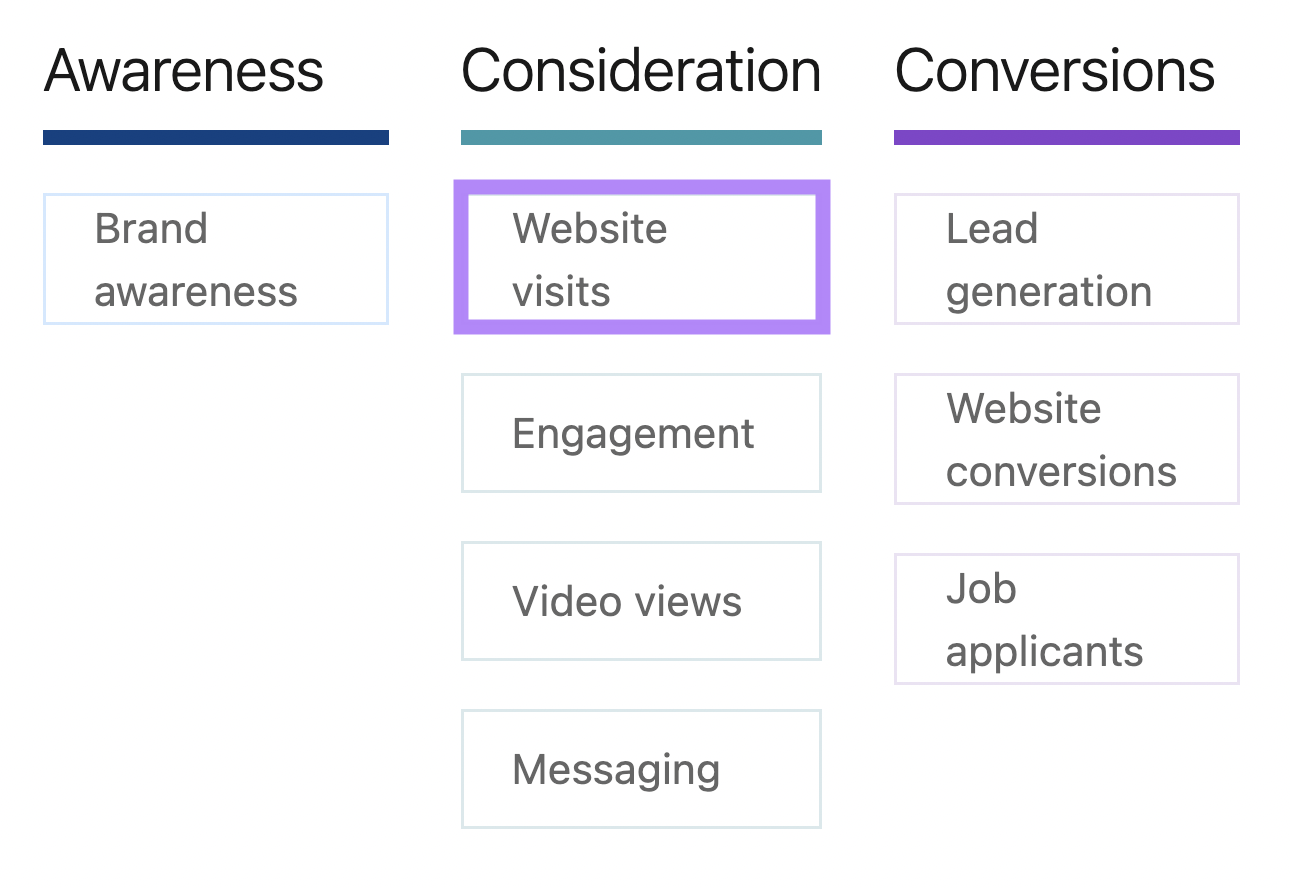
In “Advanced Mode,” you’ll have a wider range of objectives to choose from.
For now, we’ll simply select “Website visits” because we want to drive newsletter signups.
4. Define Your Target Audience
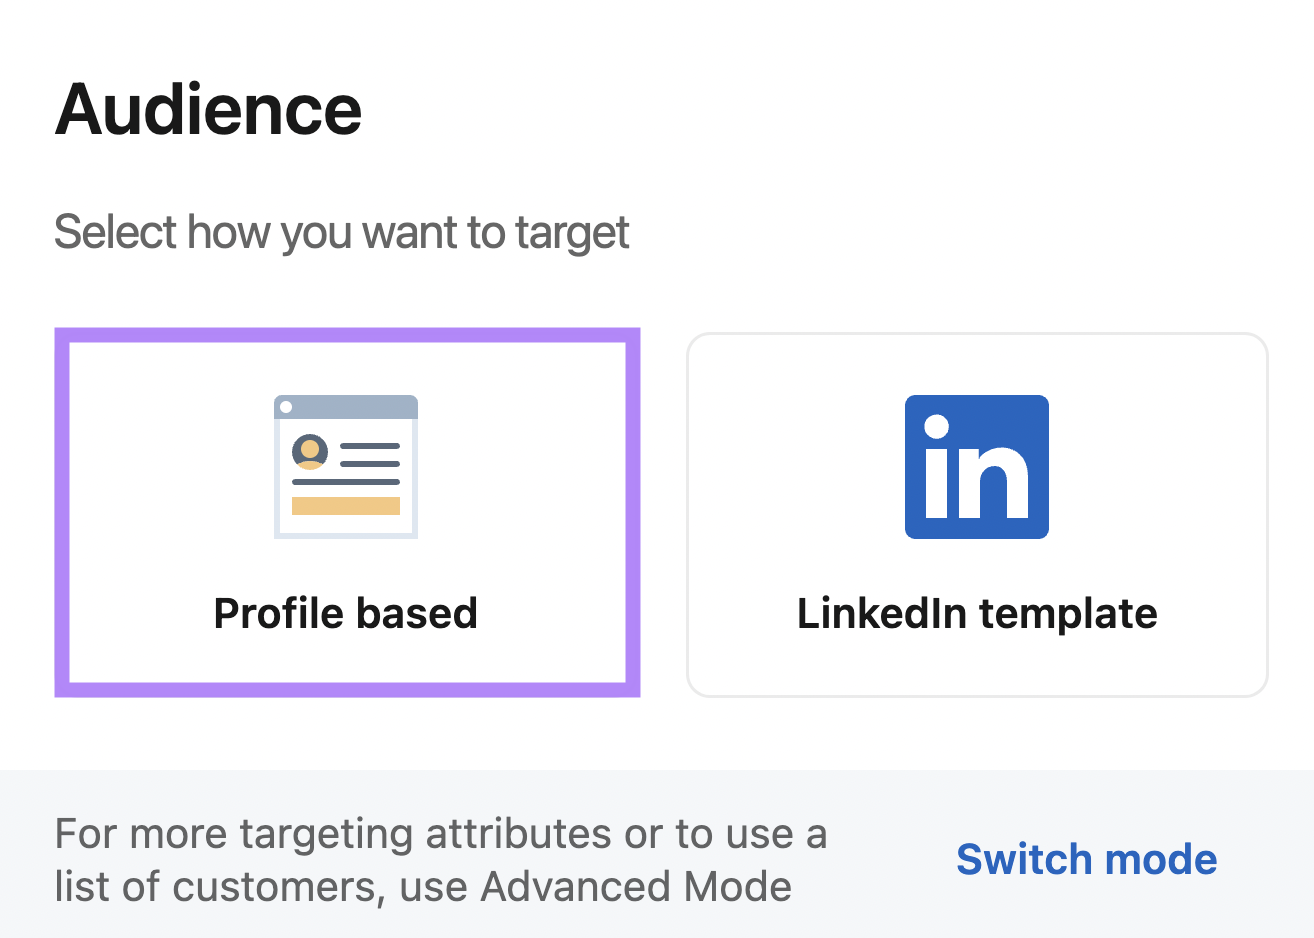
Next, choose how you want to define your audience.
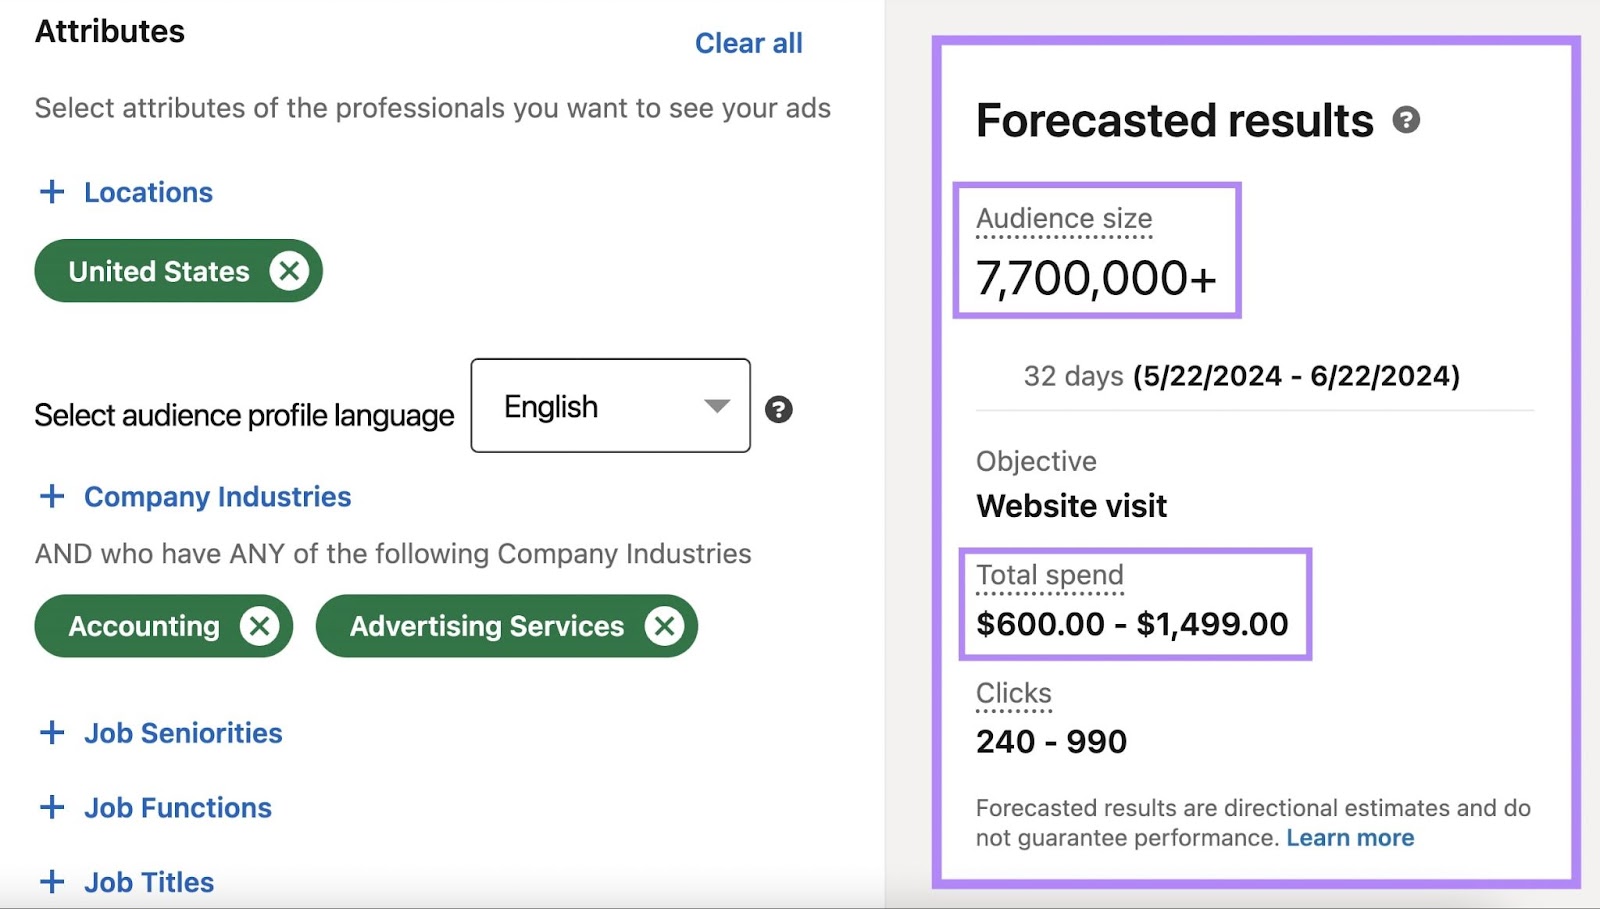
If you select “Profile based,” you’ll be able to target LinkedIn users by attributes like locations, industries, job functions, job titles, and seniority levels.
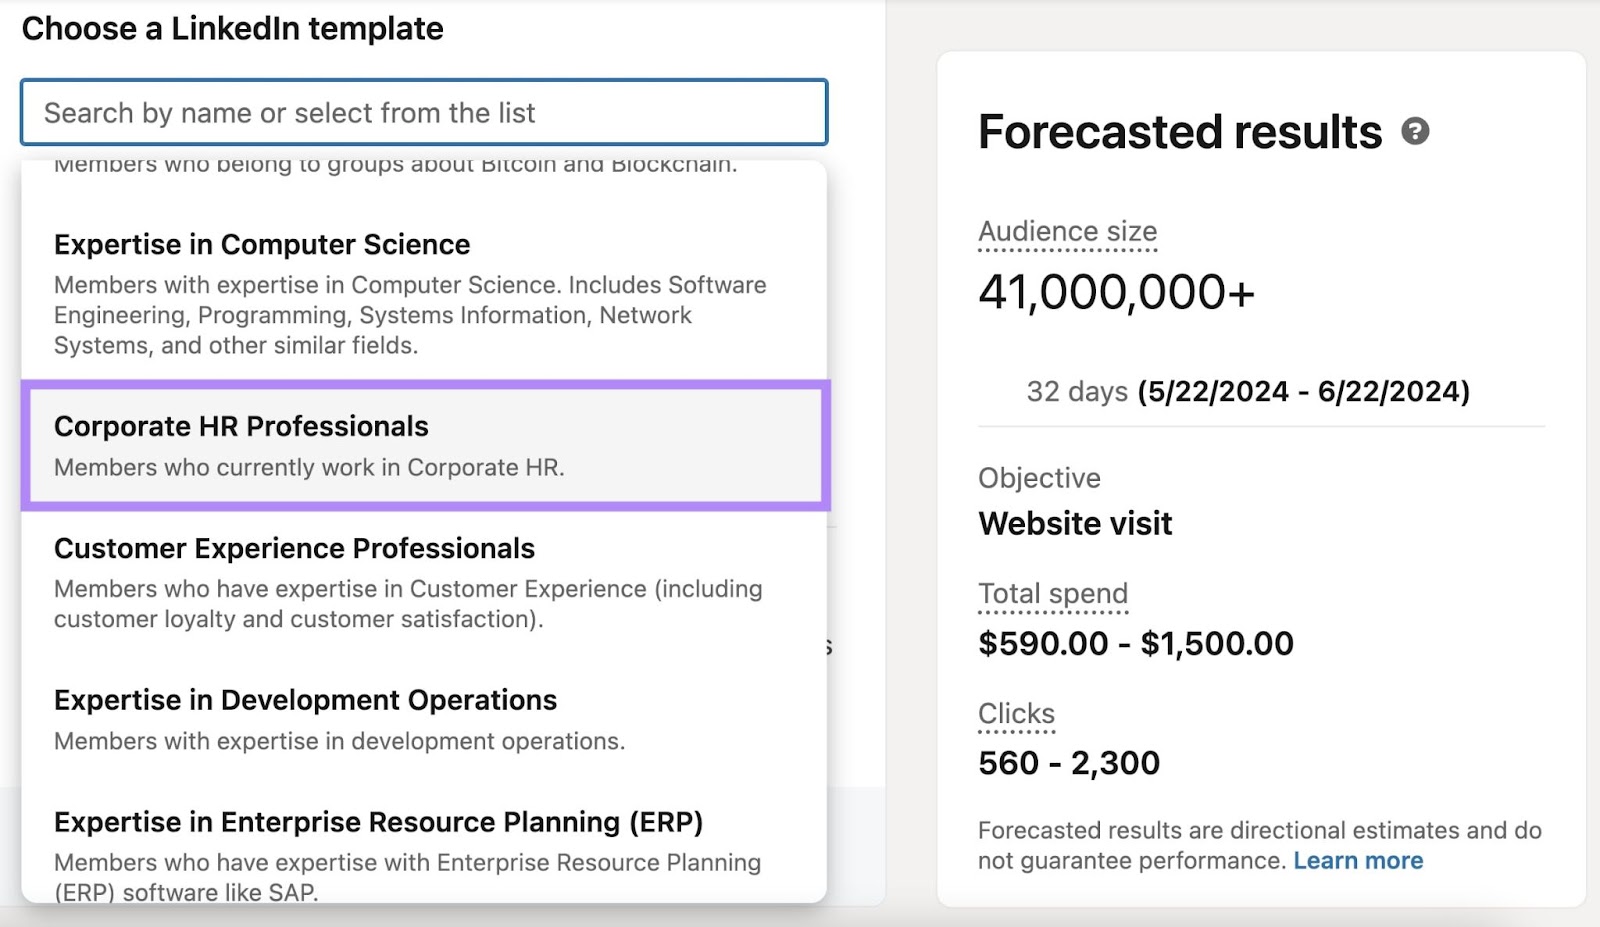
If you select “LinkedIn template,” you’ll be able to choose an audience from a list of predefined audiences.
If you chose “Profile based,” select the attributes that best describe your target audience.
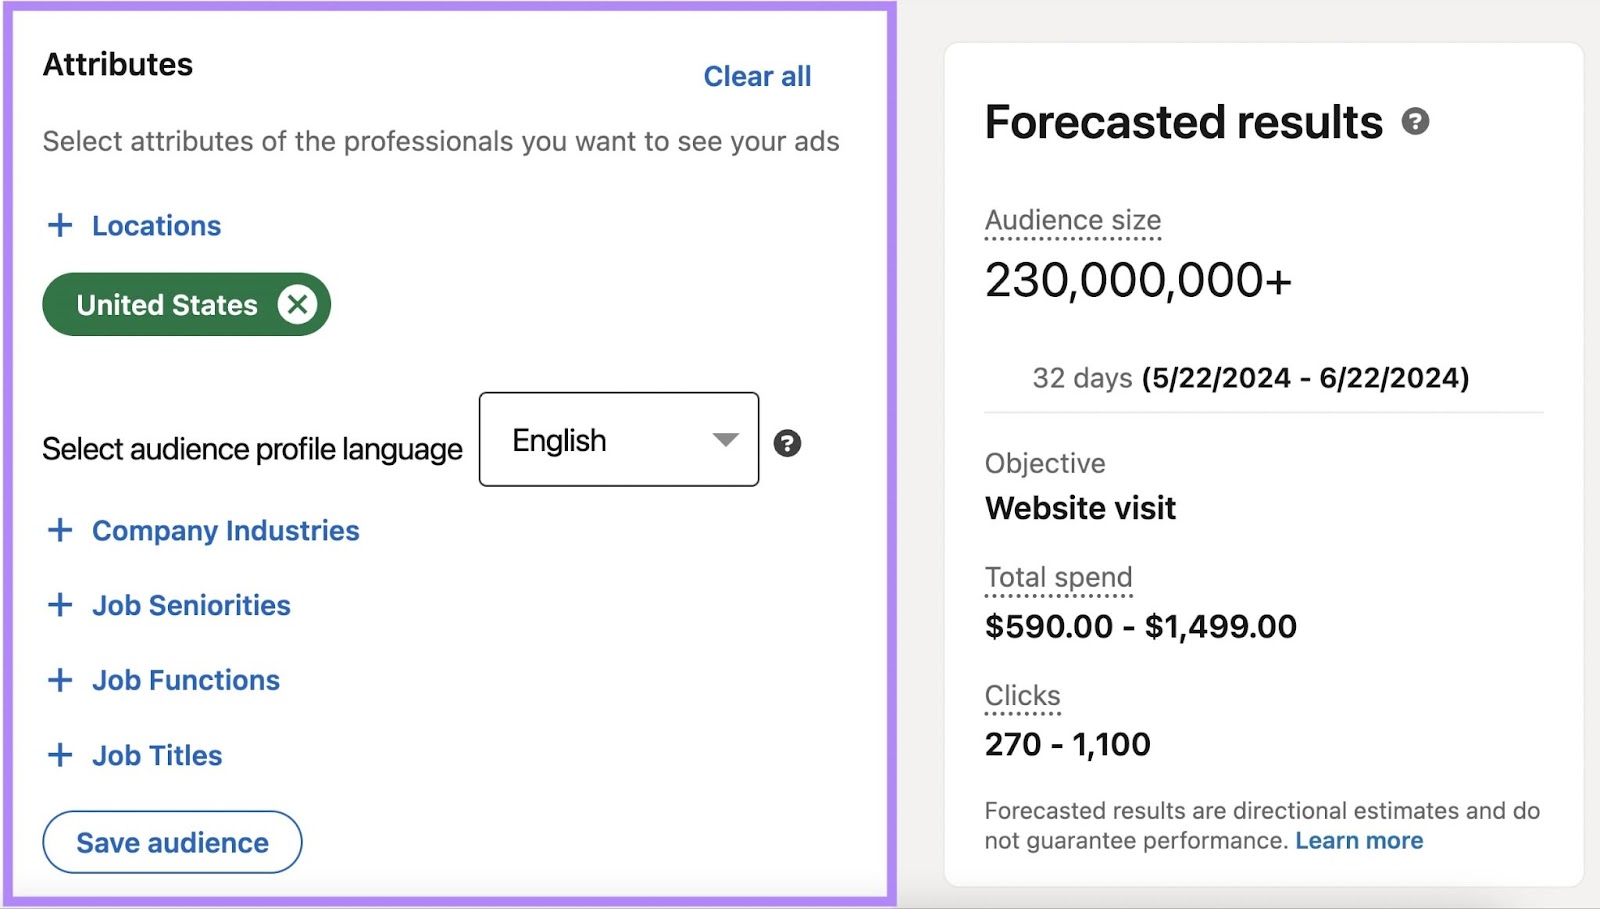
You’ll notice the forecasted results on the right (like audience size and total spend) update as you change the attributes.
If you chose “LinkedIn template,” click the search field and select an audience from the dropdown menu, or start typing to search by name.
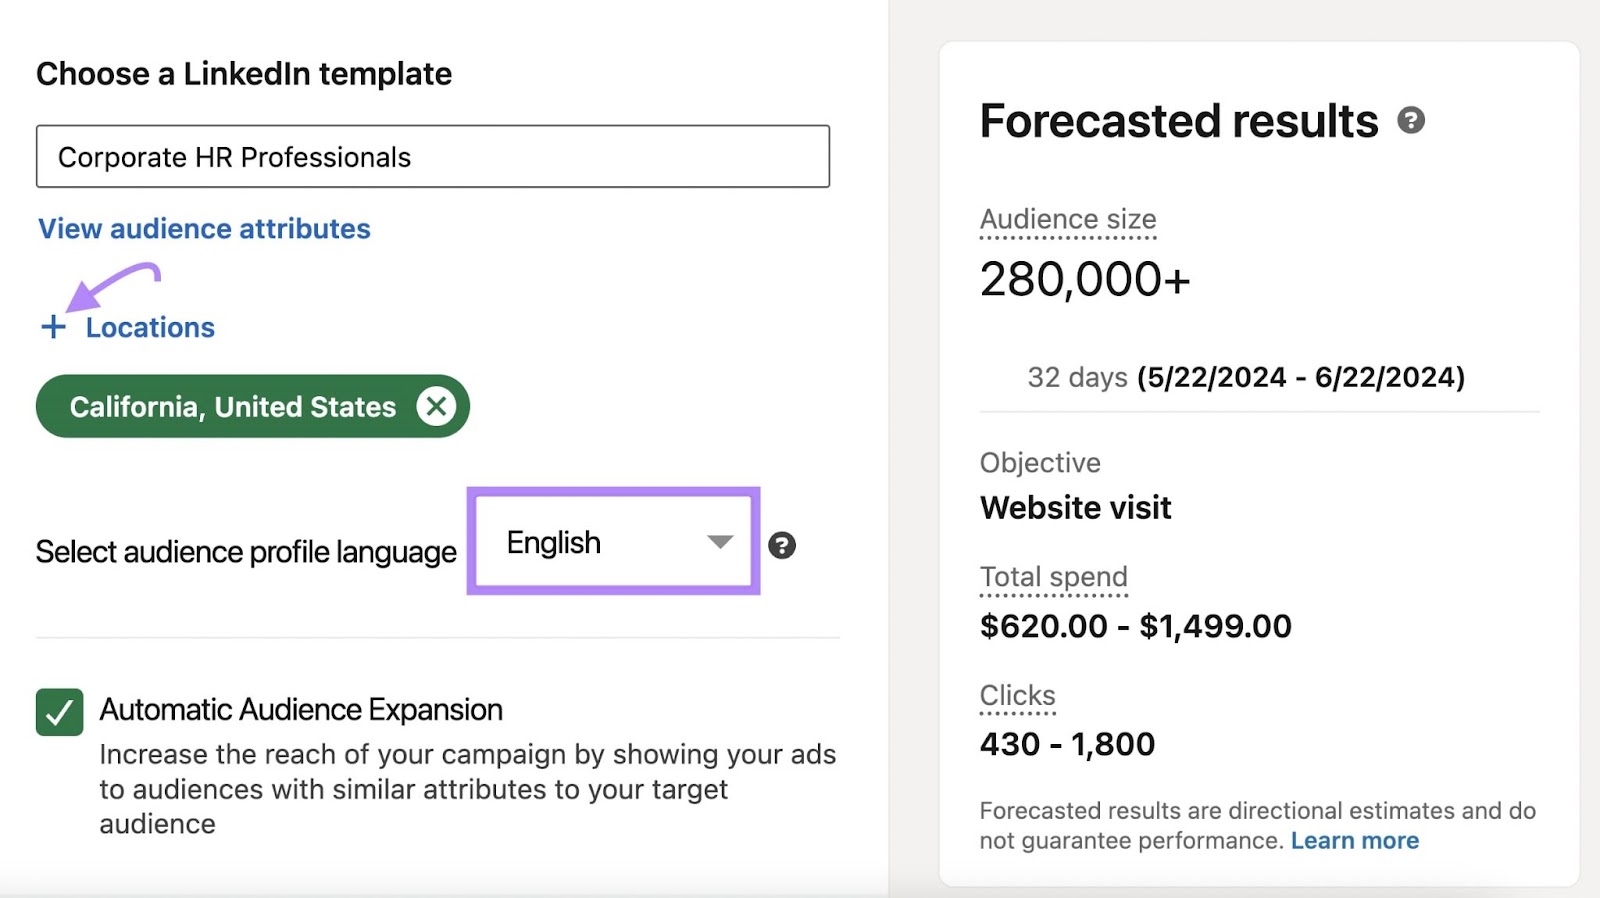
Next, select the location(s) you wish to target.
You can also change the language of the profiles targeted if you’re targeting a non-English-speaking country or region.
5. Choose Your Ad Format
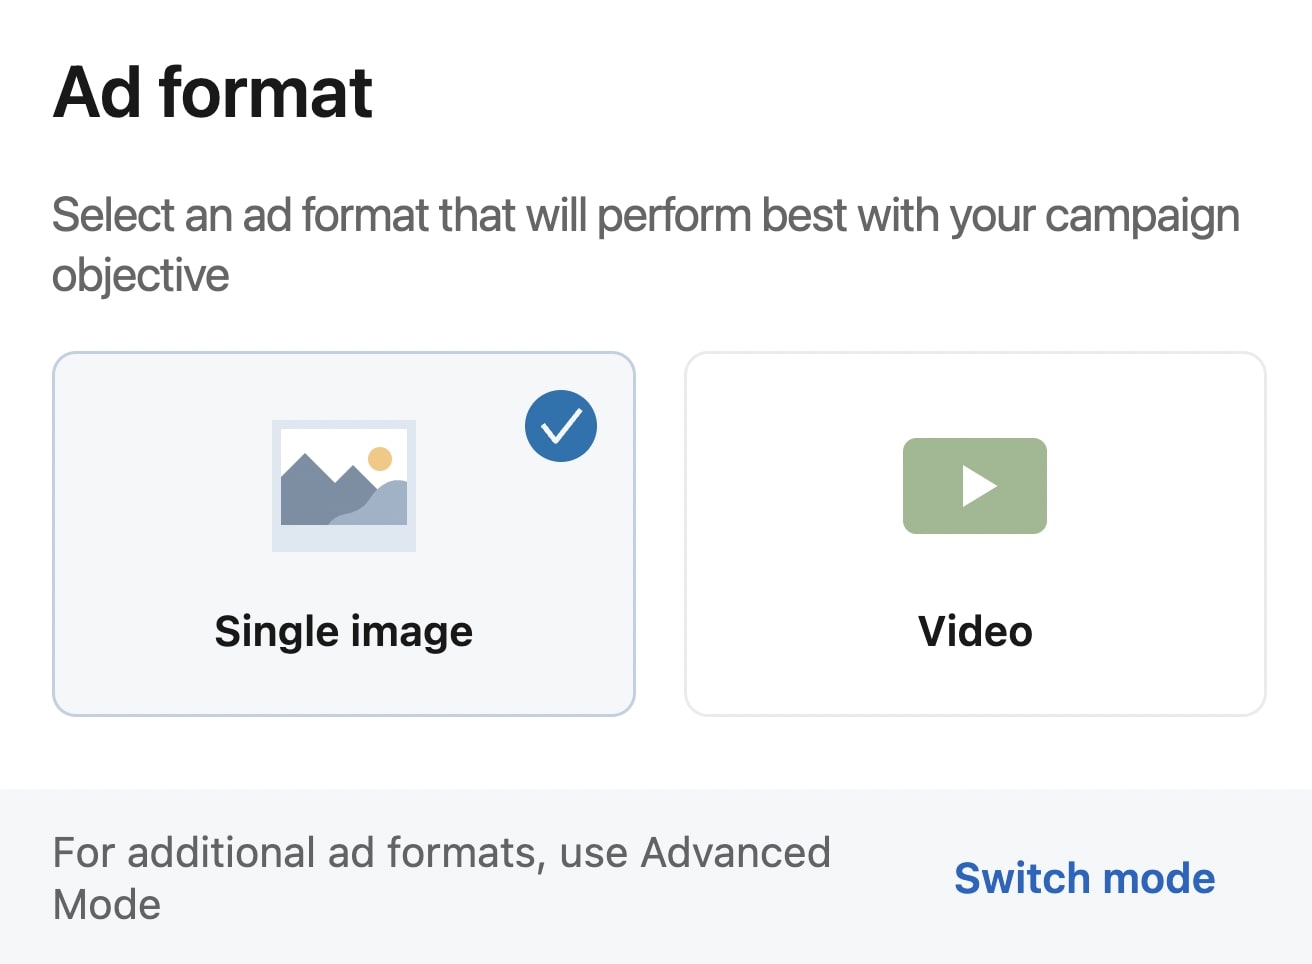
Next, scroll down and select an ad format to use. In Quick Mode, you can only choose between “Single image” and “Video.”
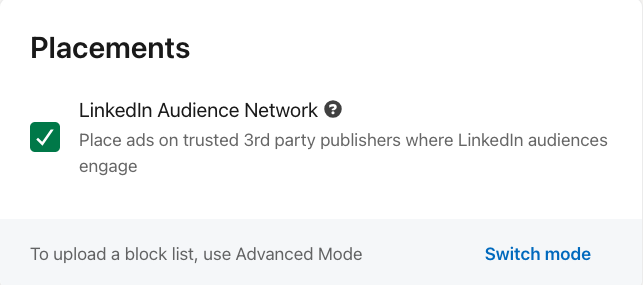
Now, decide whether your ads should also be served on third-party publishers. Note that disabling the LinkedIn Audience Network option may reduce click rates and increase cost per click.
6. Set Your Campaign Budget and Schedule
In Quick Mode, setting your campaign budget is as simple as entering a daily or lifetime budget and defining the campaign’s run time.
Note that setting an end date is optional when “Daily budget” is selected. To be safe, it’s best to set an end date so you don’t spend more than intended if you forget to end the campaign.
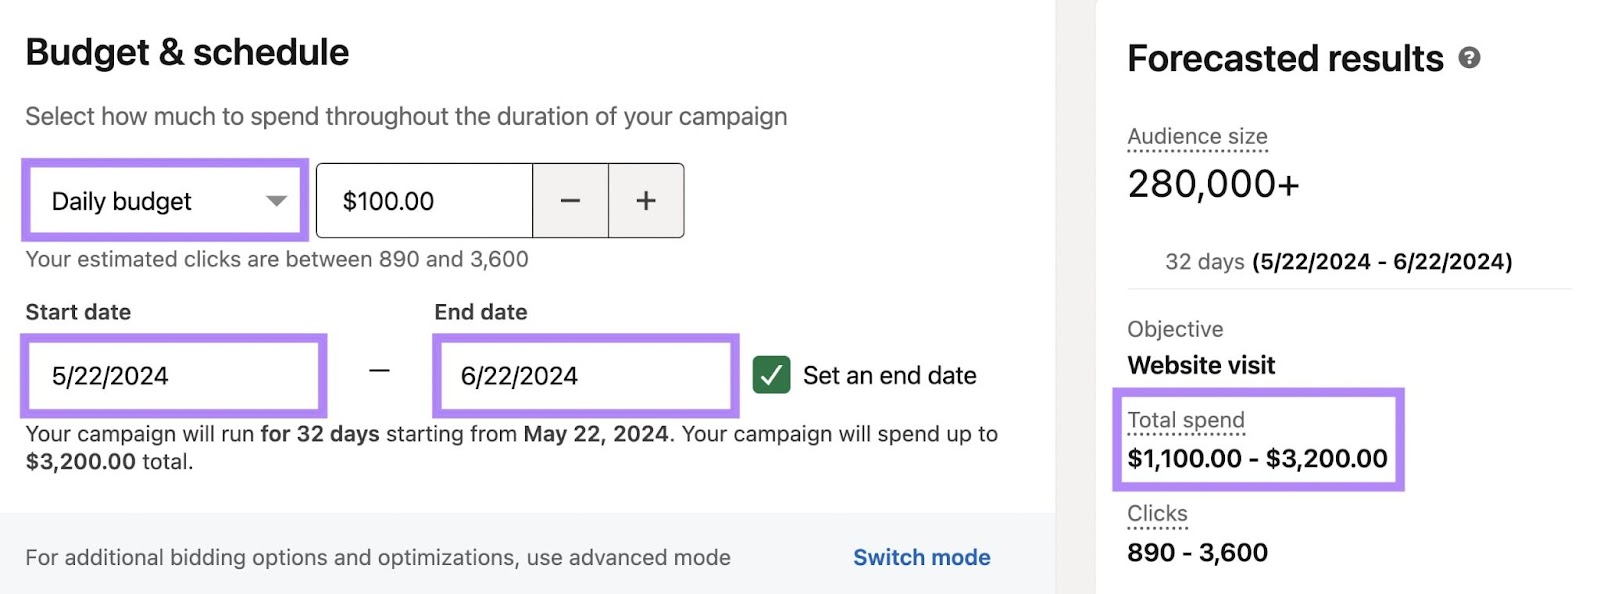
In Advanced Mode, you’ll have more control over your bidding strategy.
Once you’ve set your campaign budget and schedule, click “Save and continue” if your ad creative is ready to go. Or, “Save and exit” if not.
Note that you won’t be able to update the ad format or objective once you save your campaign at this step.

7. Craft Your Ad Creative
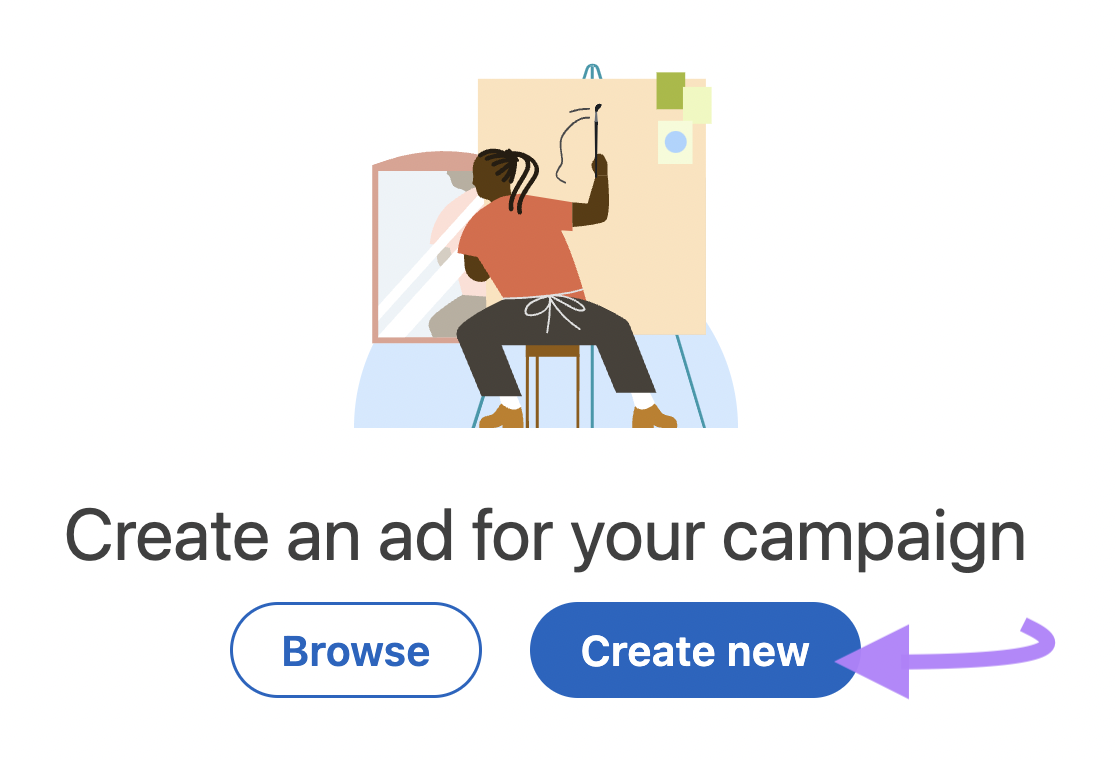
Next, you’ll get the option to either select a creative asset from your content library or create a new ad.
Click “Create new.”
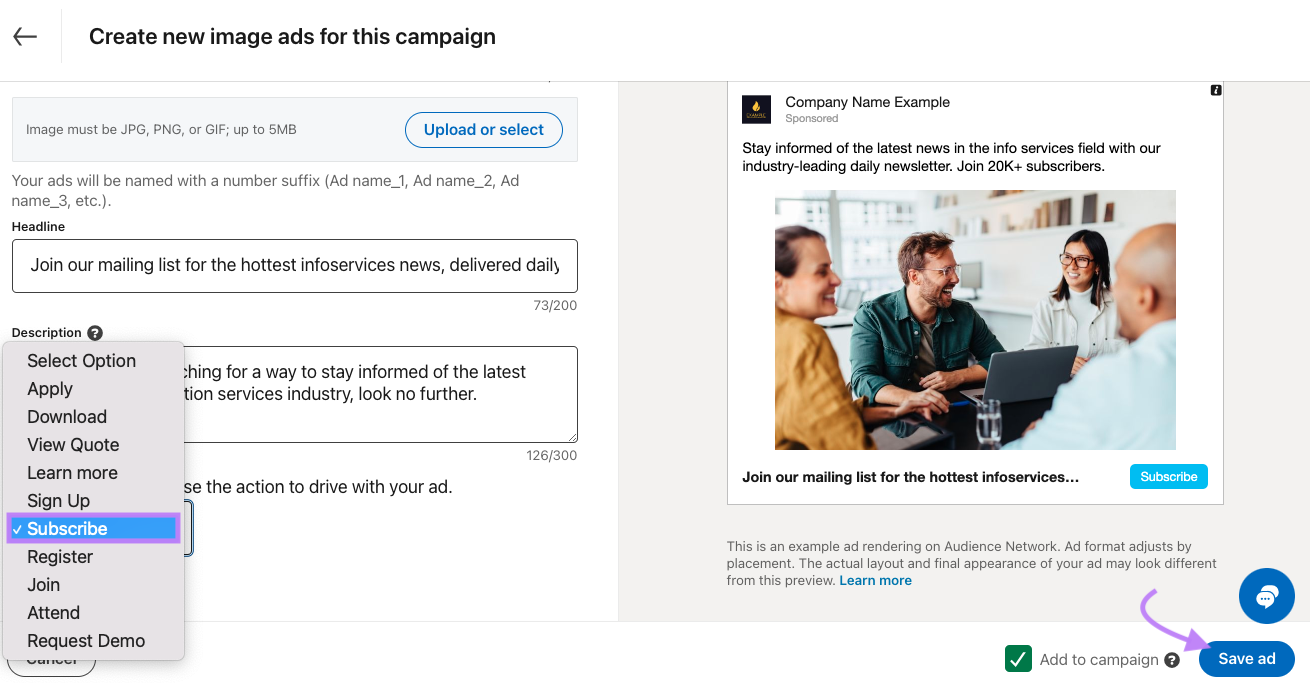
Create your ad by completing the fields provided and adding your image(s). Preview your ad on the right and toggle between different display formats.
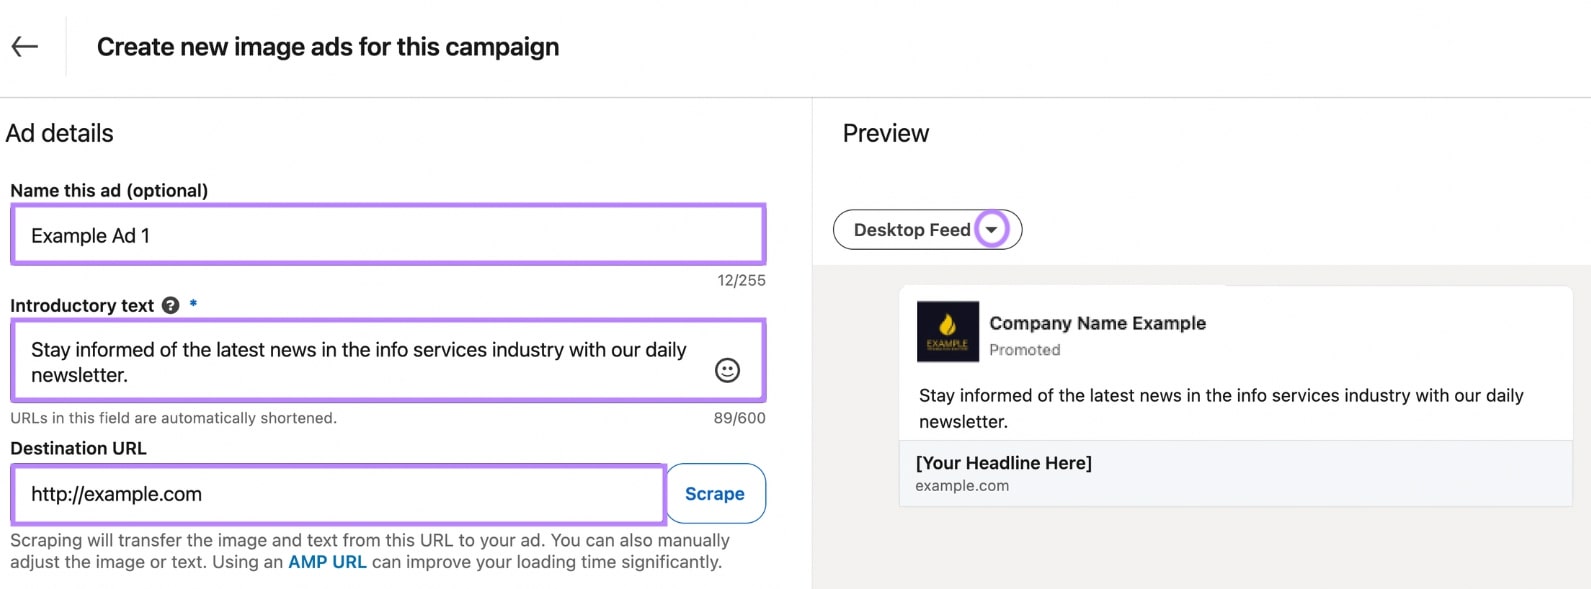
Scroll down to complete the rest of the form and add your image(s).
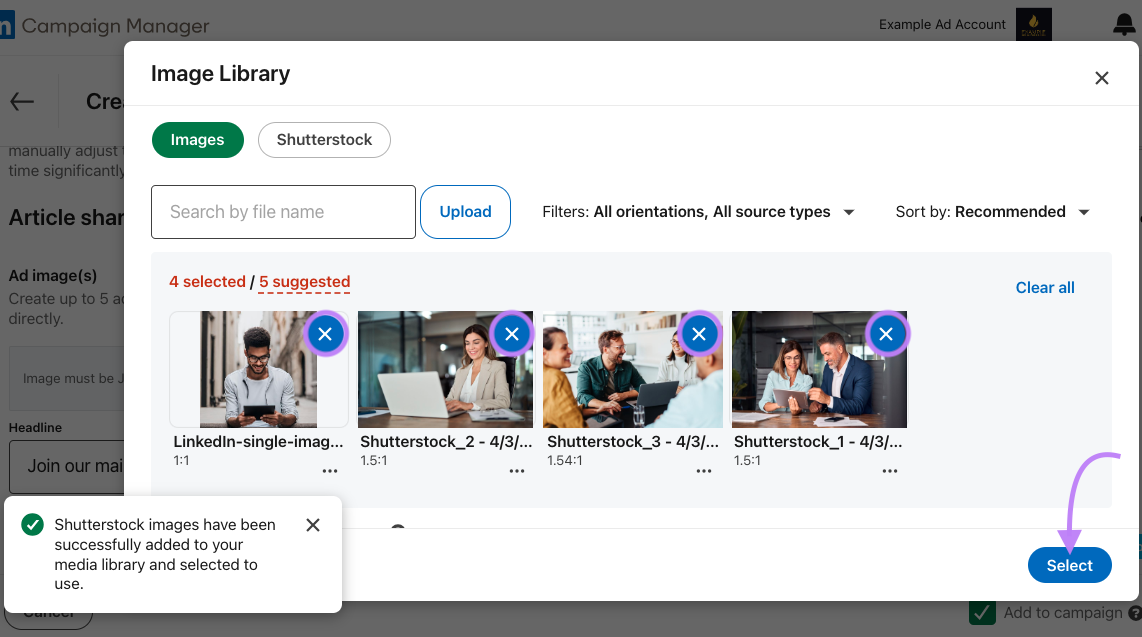
Choose from the images uploaded to your library or upload new images. Or, grab some from Shutterstock right in the image selection workflow—each account gets 10 free Shutterstock images.
Create up to five ads simultaneously by adding multiple images to the same ad.
Once you’ve chosen your ad images, open the image preview screen and finalize your selection.
Click the blue “X” in the corner of any image you want to remove. Then click “Select” to add your chosen images to your media library.
Make sure you’ve completed all the fields. Then, select which CTA you want your ad to display. In this case, we’ve chosen “Subscribe.”
To proceed, click “Save Ad.”
Your ad will be saved under the campaign name you chose in step two.
8. Review and Launch Your Campaign
All that’s left before launching your campaign is reviewing your campaign settings. And adding or updating your business information and payment method.
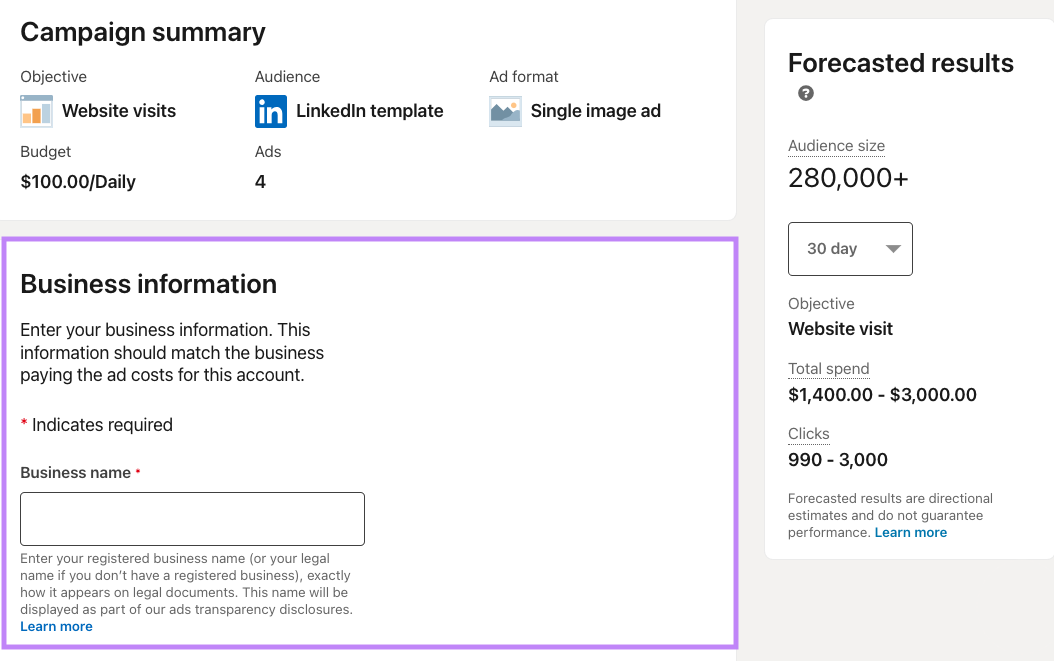
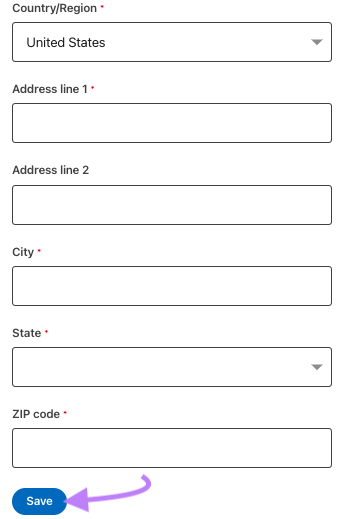
Simply complete the “Business Information” form and click “Save.”
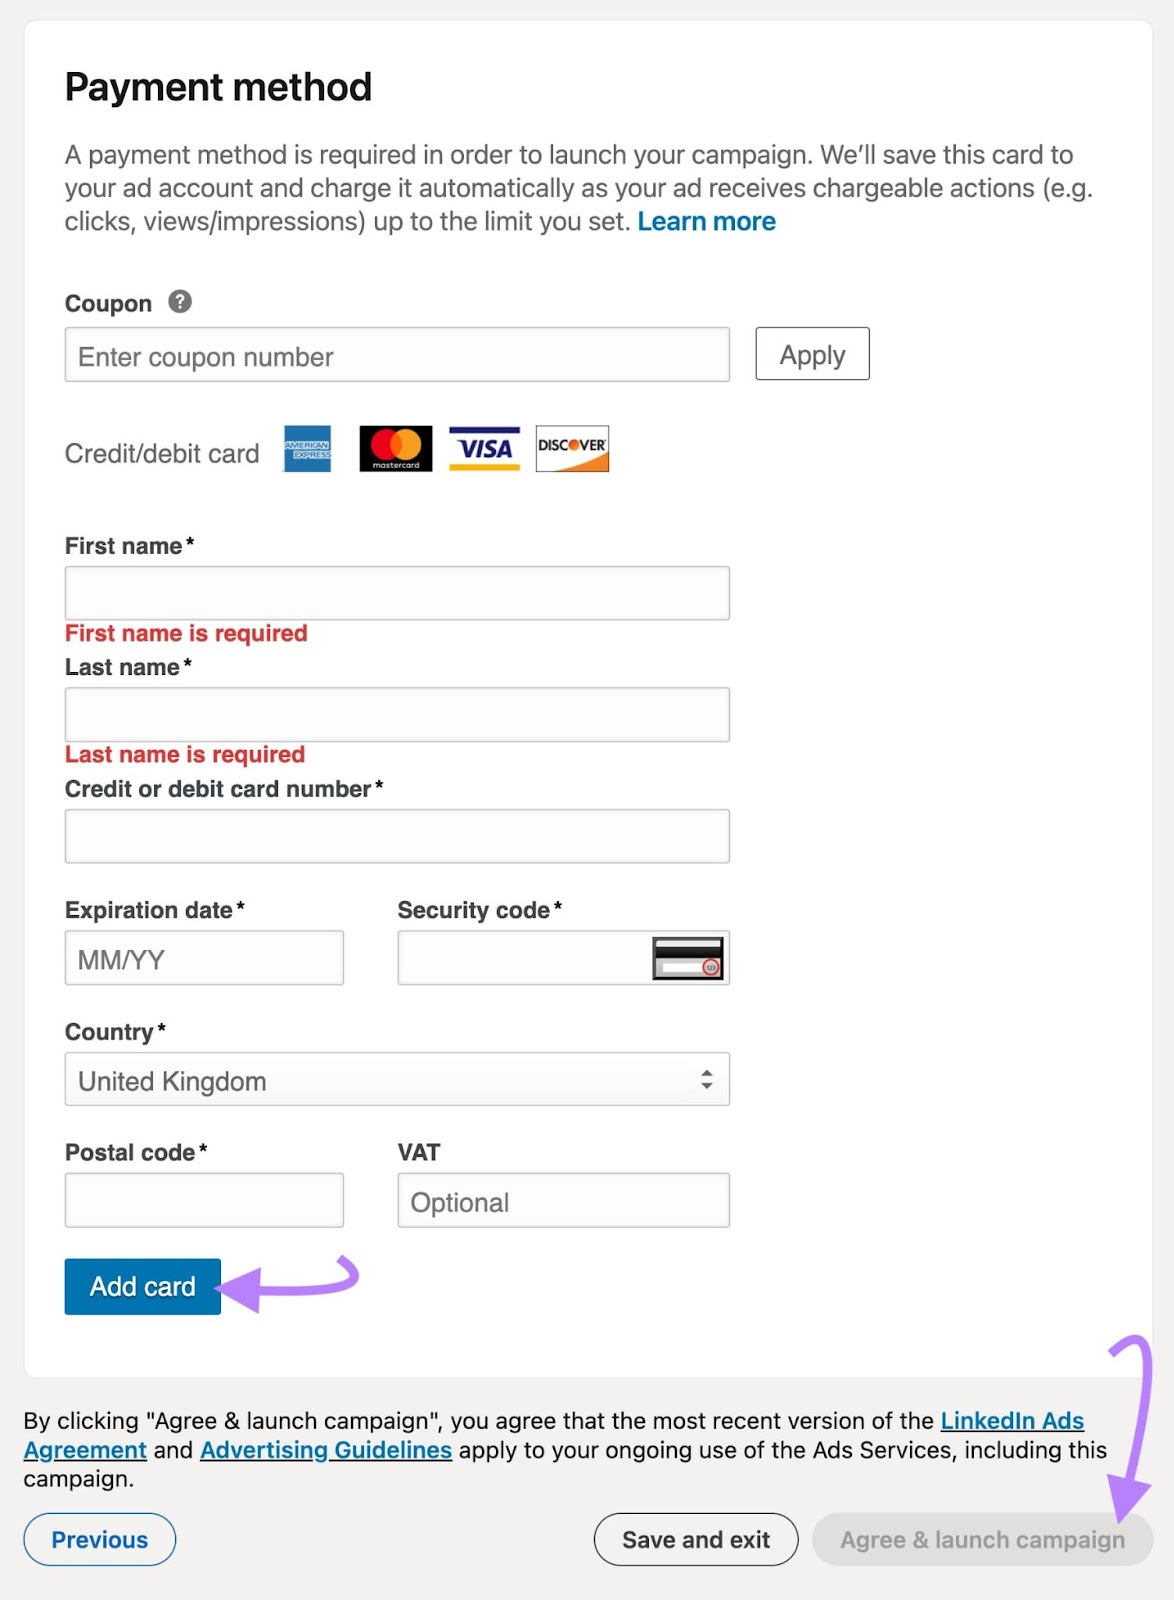
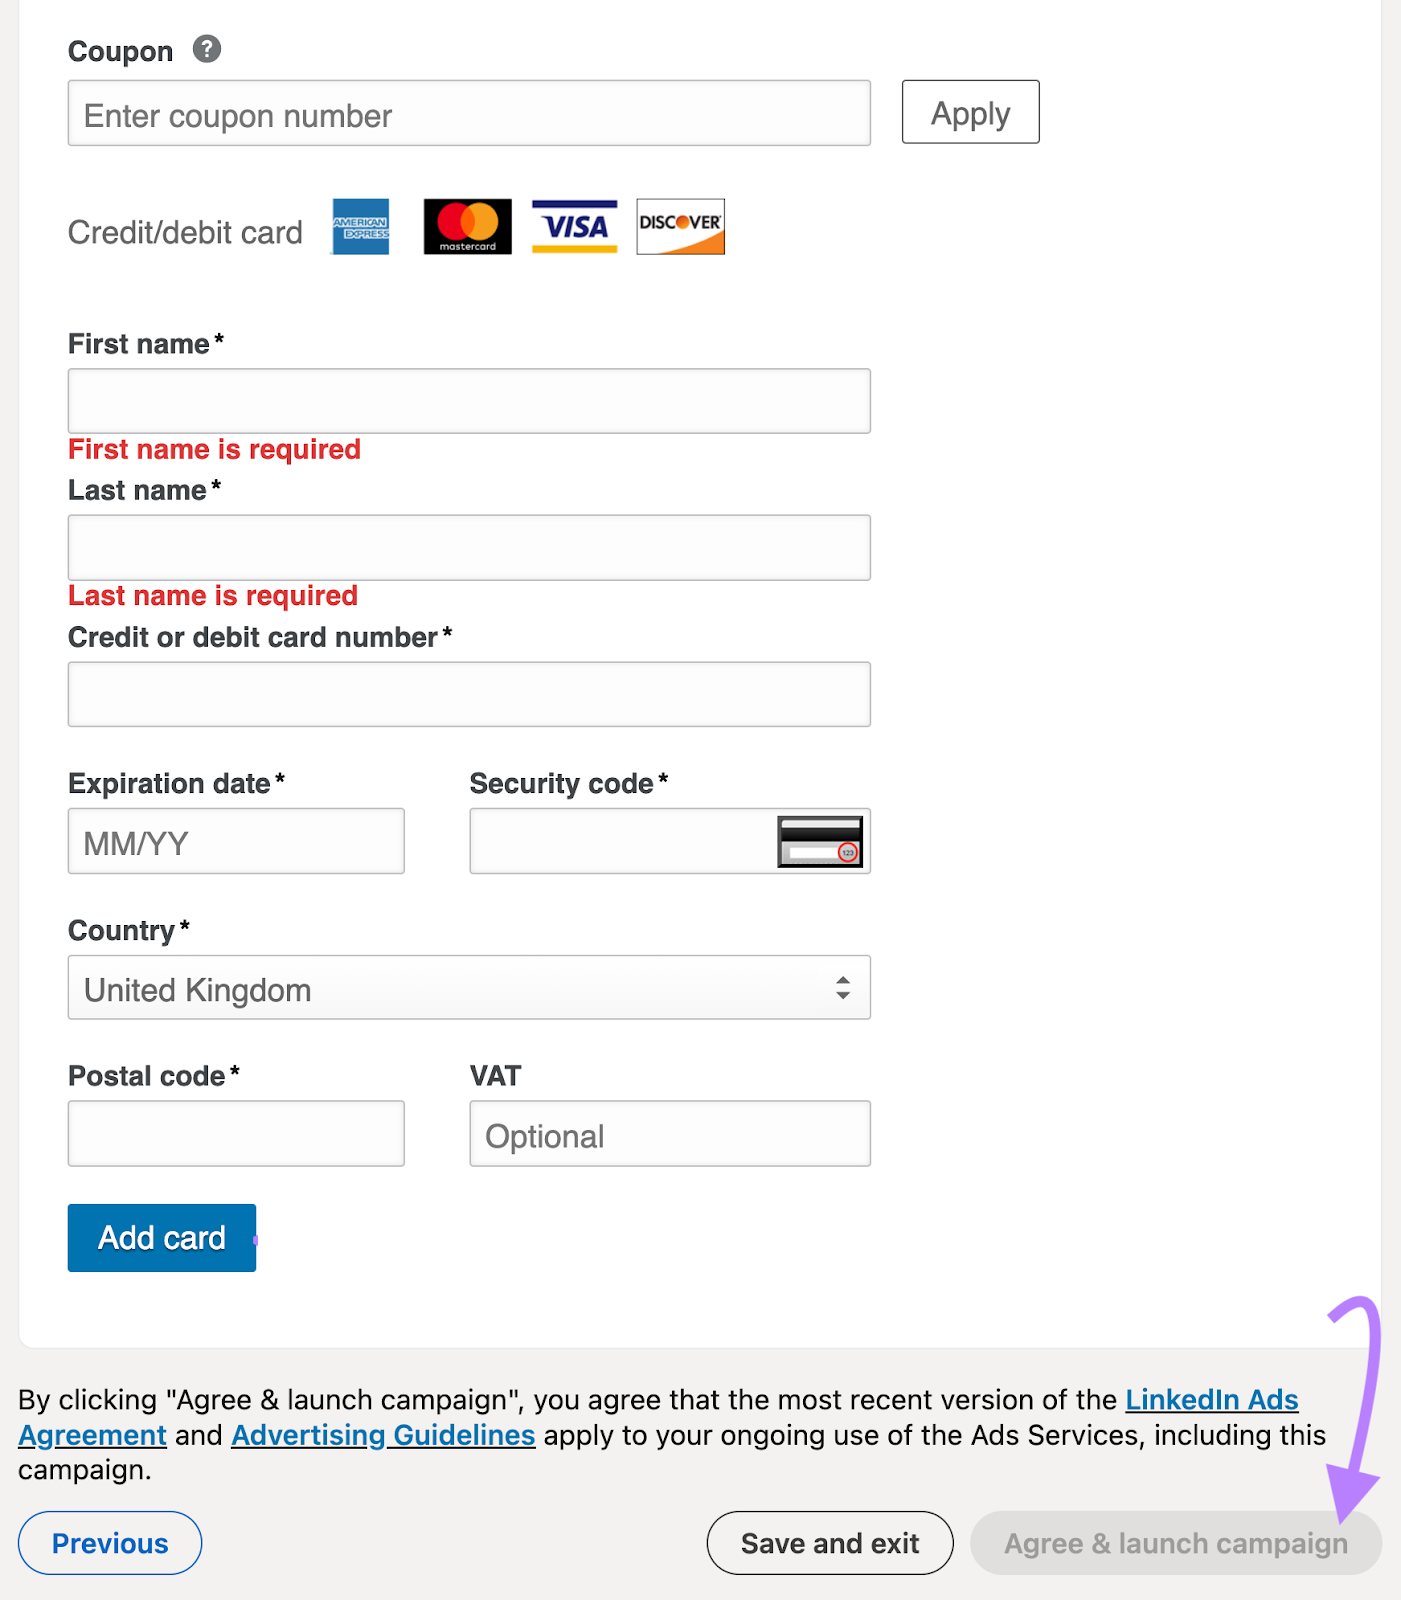
Next, add the debit or credit card to be billed for the campaign. Then, click “Add card” followed by “Agree & launch campaign.”
Or, click “Save and exit” to save your ad as a draft and return to launch it later.
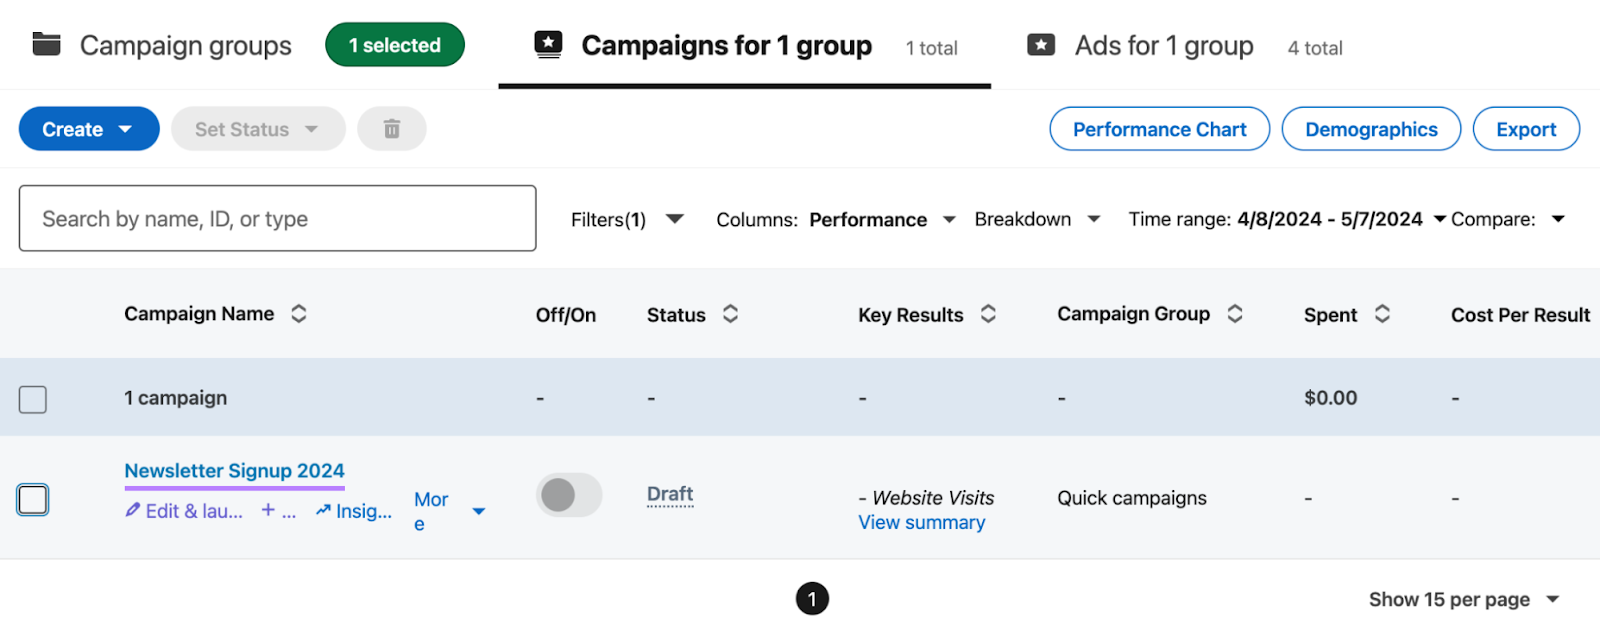
To review your campaign settings, hover over the campaign name and click “Edit & launch.”

This opens your campaign settings in the Campaign Manager.
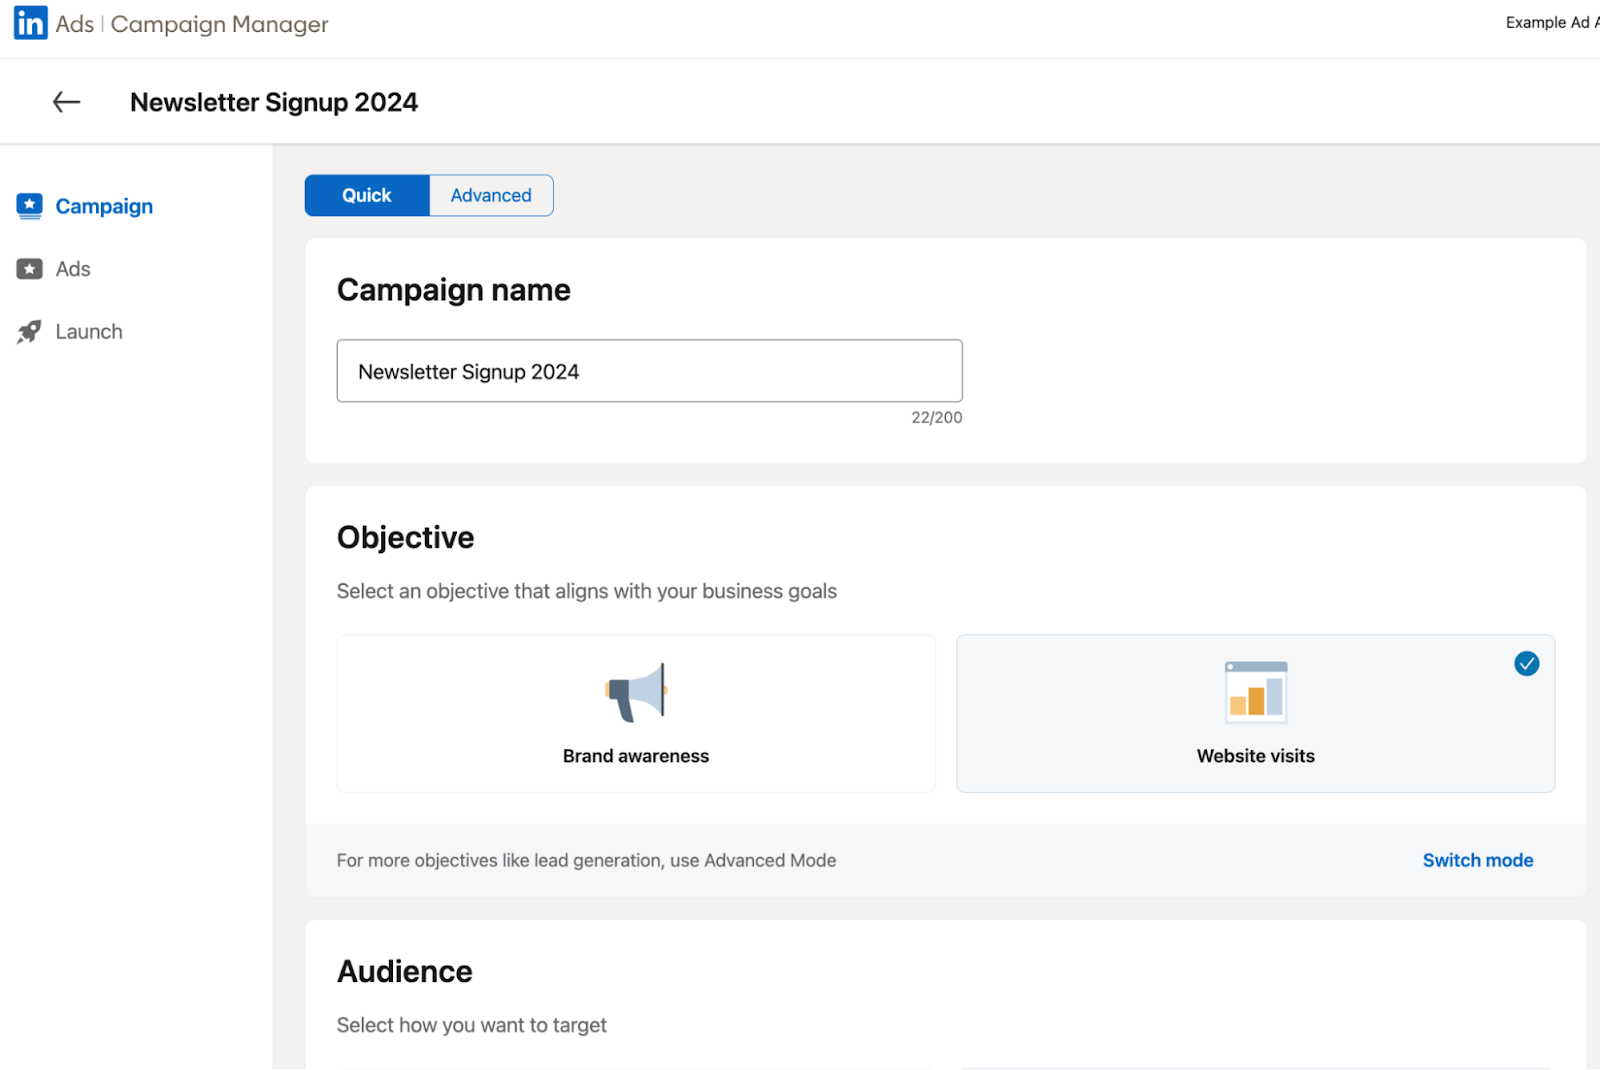
Review each page and click “Next” when you’re ready to review the next page.
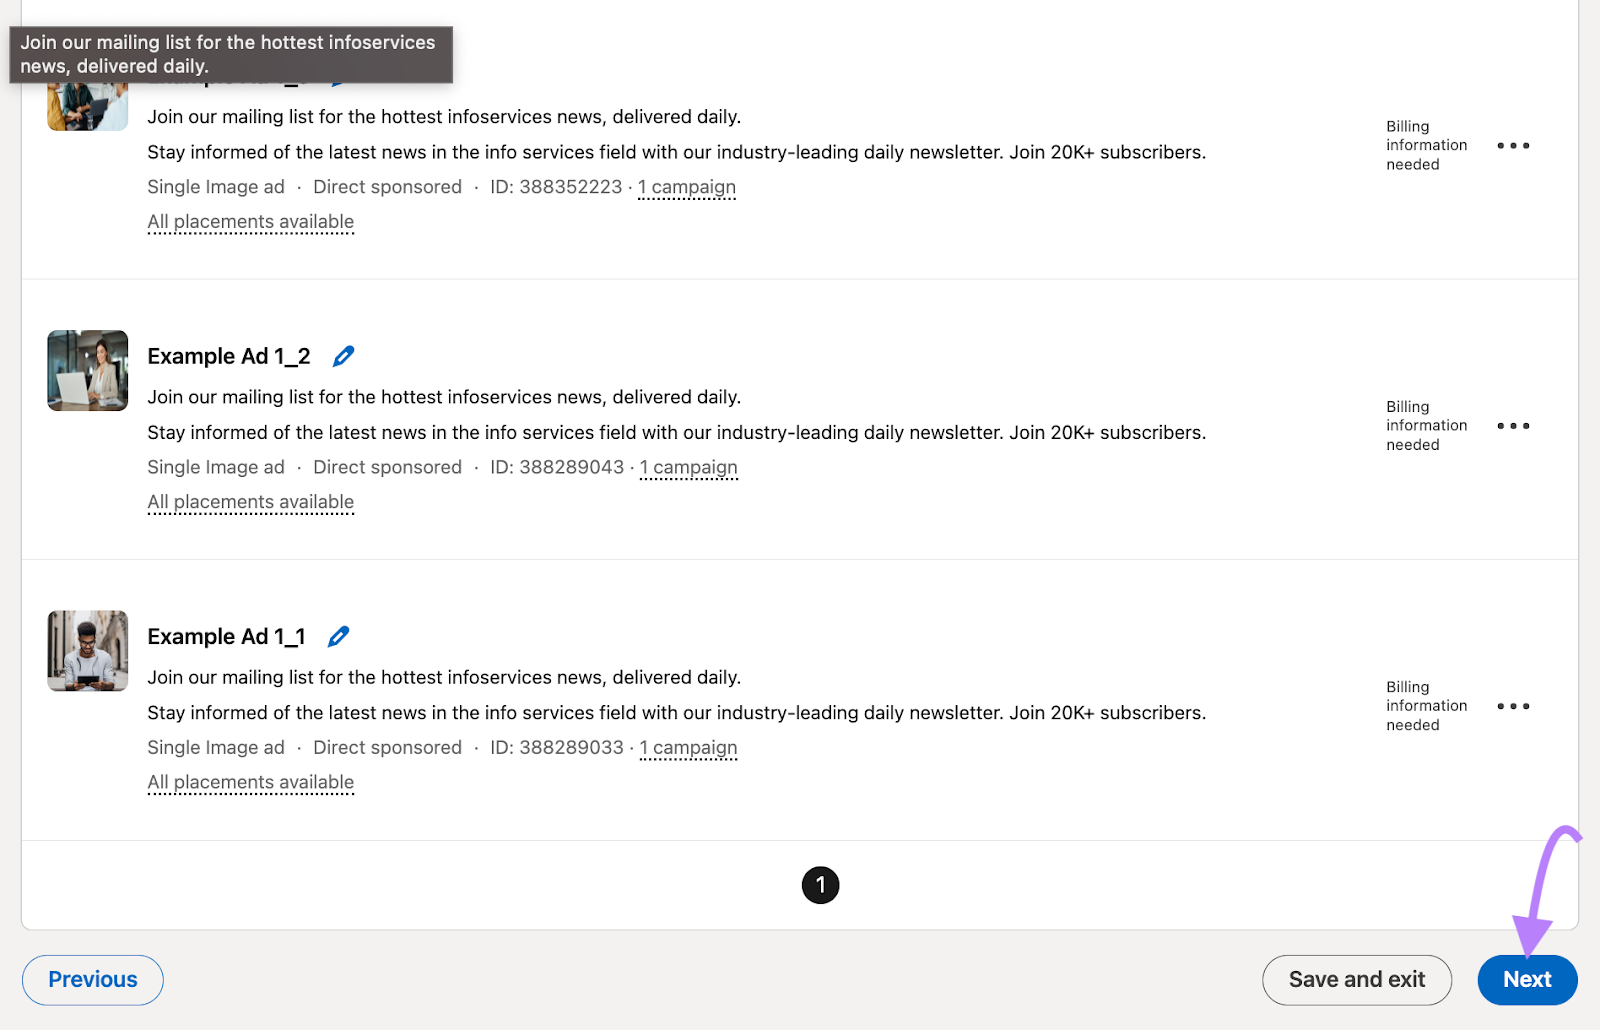
After reviewing your payment method on the third page and reading the Ads Agreement and Advertising Guidelines, click “Agree and launch campaign.”
You can also preview your ads as they’ll appear to LinkedIn users from the page listing your campaigns.
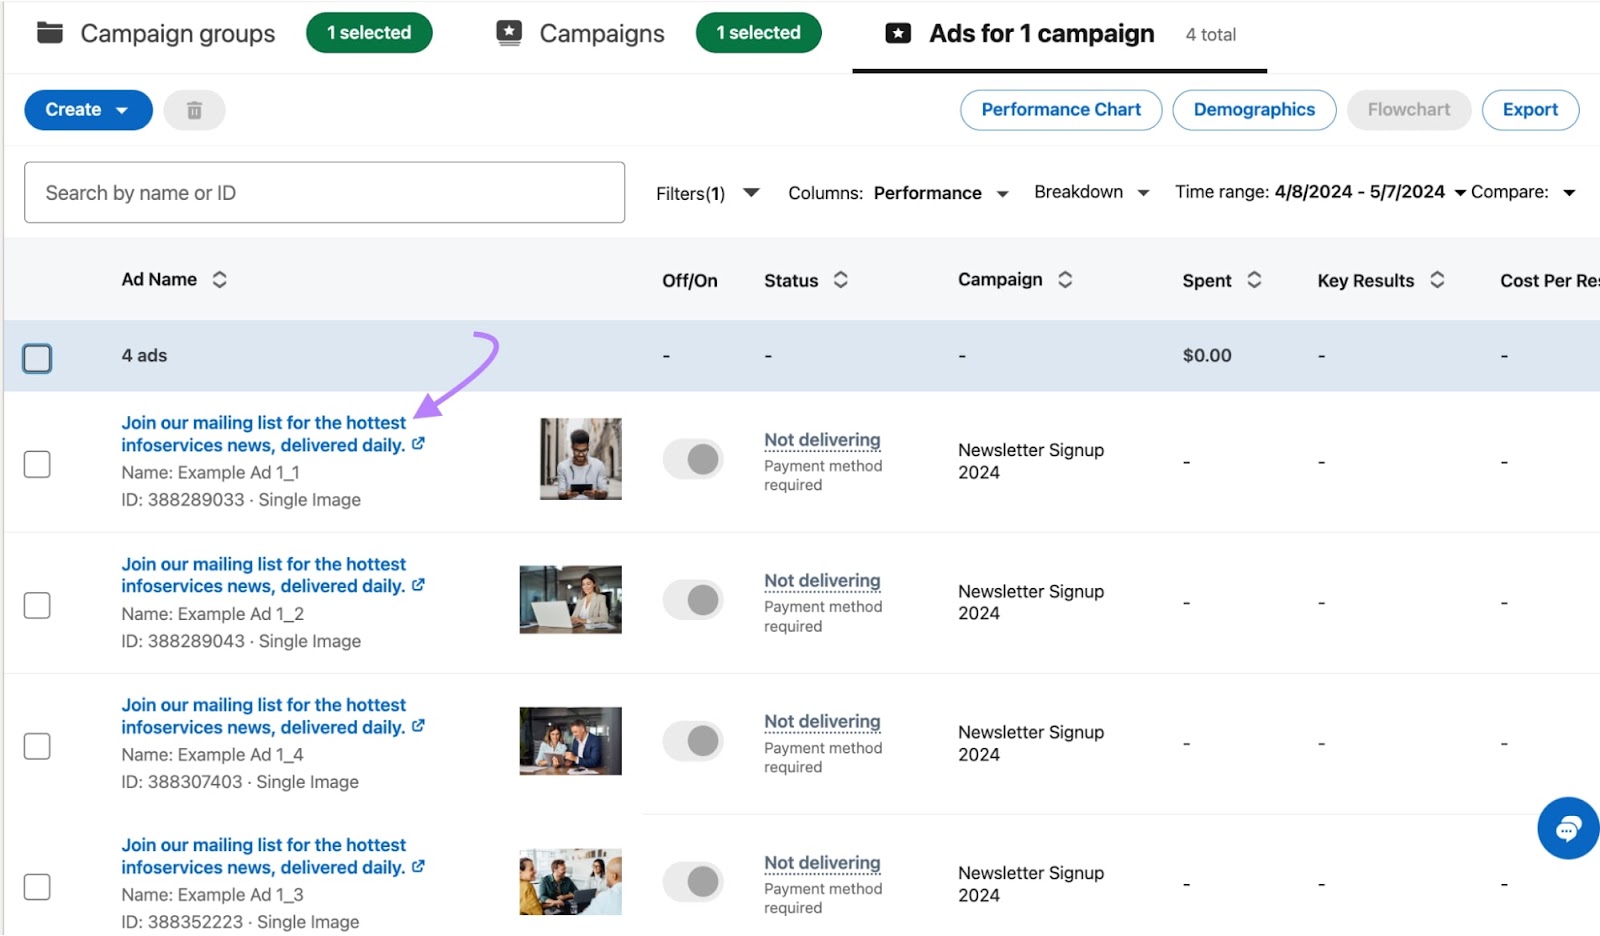
Simply click on the name of the campaign you just created. This opens a list of all the ads in your campaign.
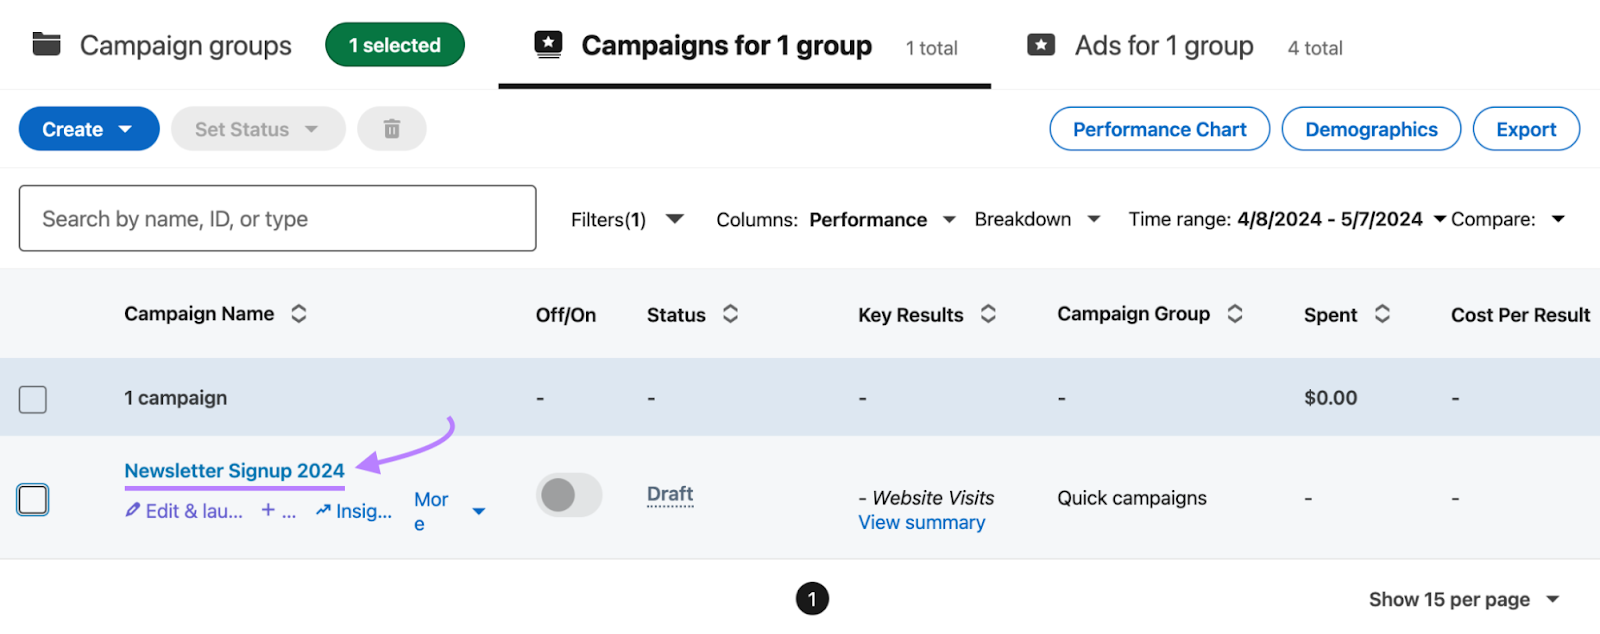
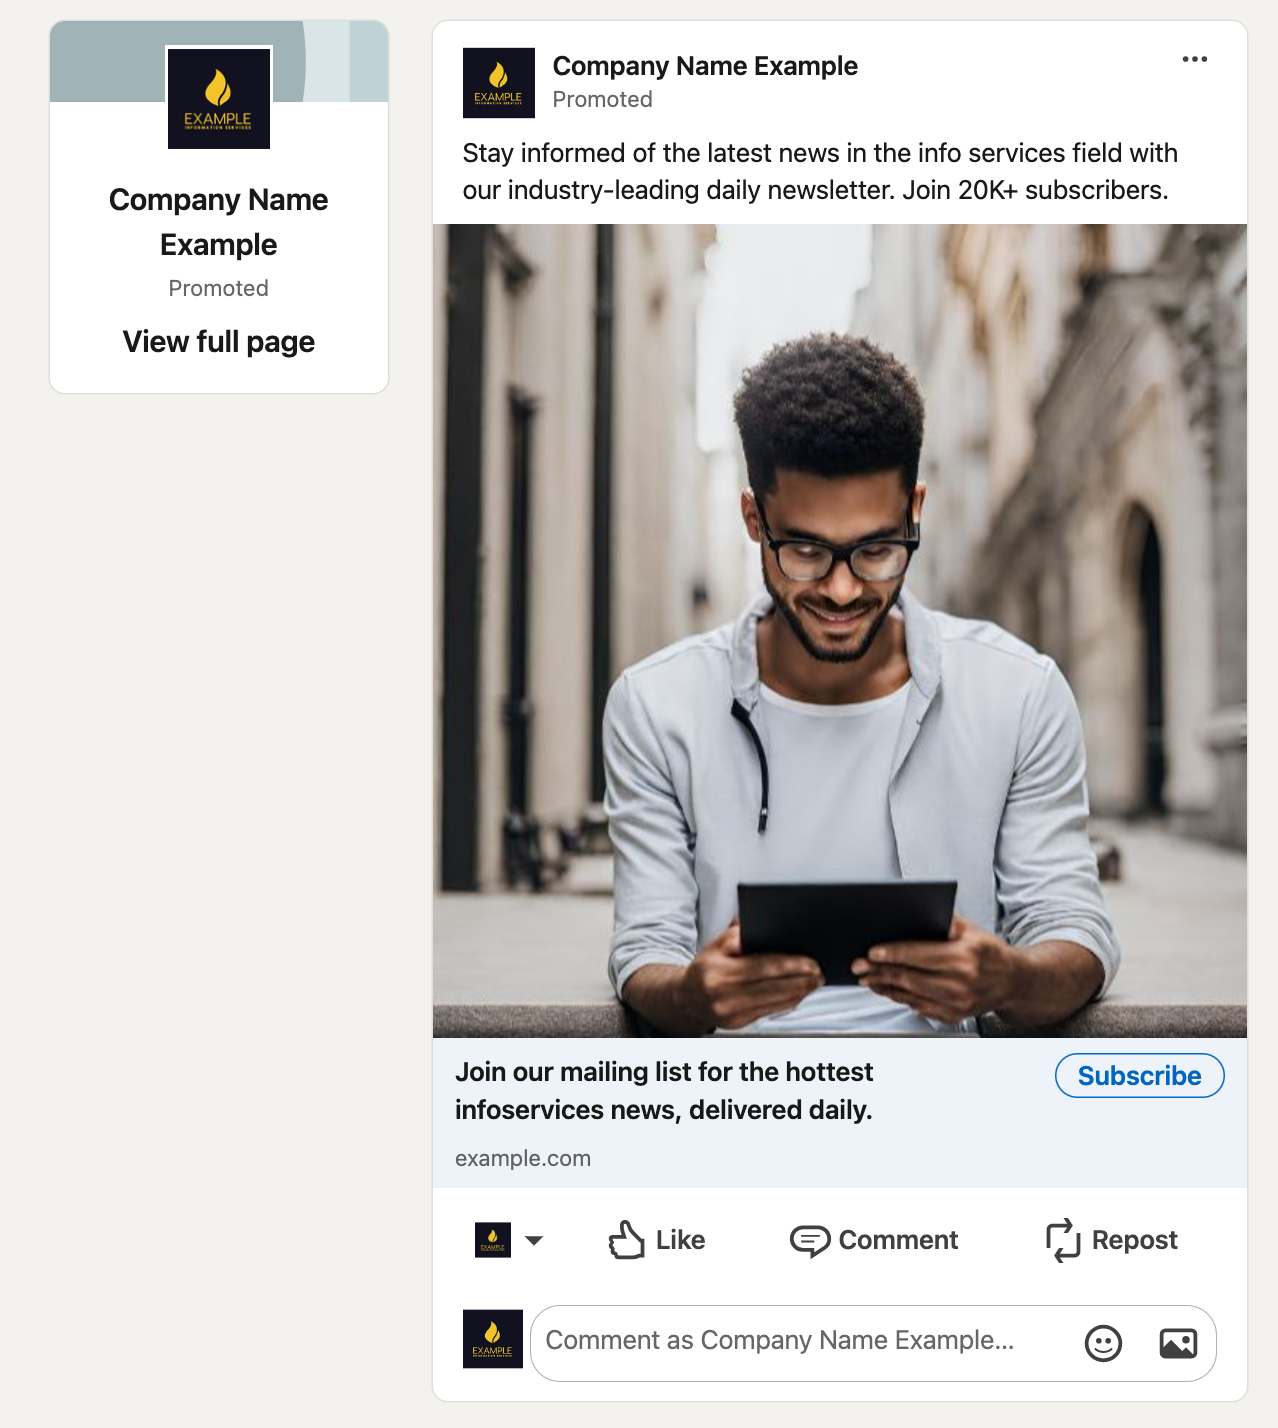
Next, click the name of the individual ad you want to preview.
Your preview will open in a new browser tab.
9. Track and Manage Your Campaign
Once your campaign is live, track its performance using the dashboard in your Campaign Manager account.
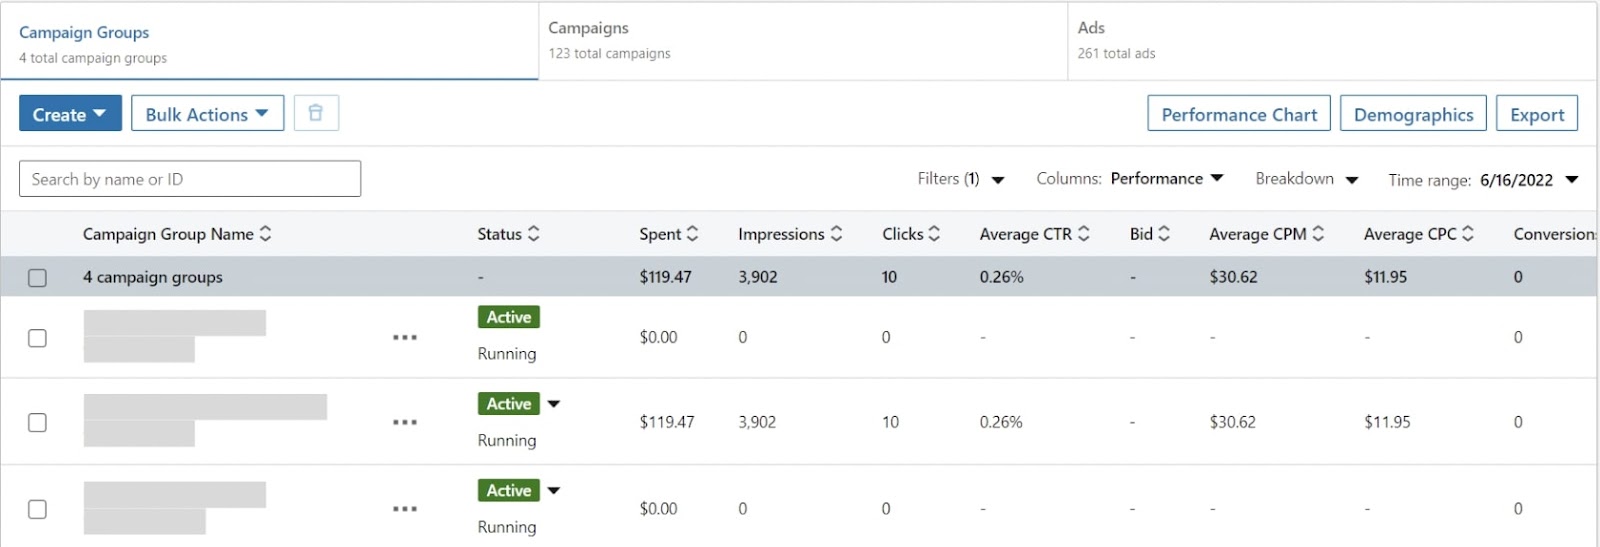
Image Source: LinkedIn
Use Semrush’s Social Analytics tool to get detailed analytics for your LinkedIn Business Page alongside analytics for your other social media accounts.
Track metrics including:
- Follower count
- Number of impressions
- Types of engagement
- Engagement rate
- Number of unique page visits
- Performance data for individual posts
To get started, connect your LinkedIn account to your Semrush account.
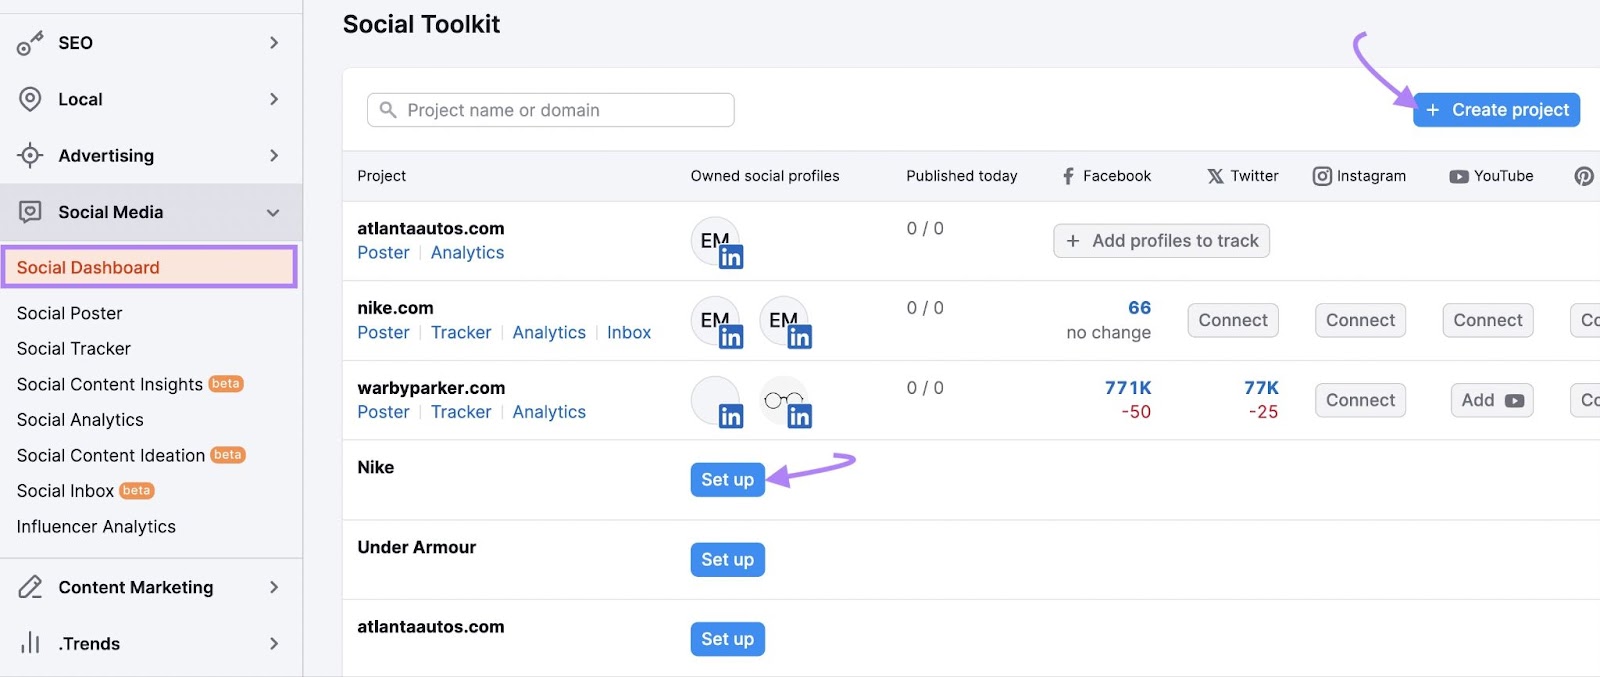
In Semrush, click “Social Dashboard” under “Social Media” in the main menu.
Next, click “+ Create project.” Or, select your project from the list if you’ve already done so by clicking “Set up.”
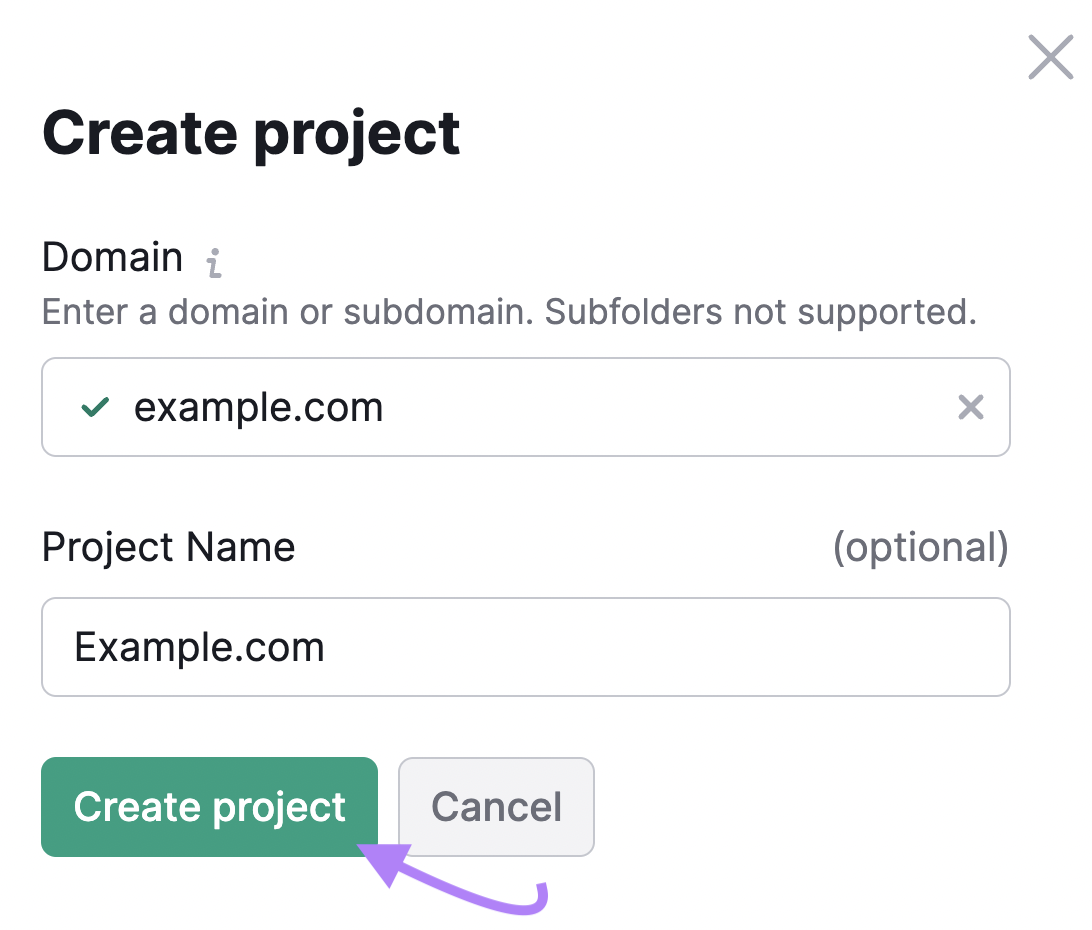
Enter your domain name and give the project a name. And click “Create project.”
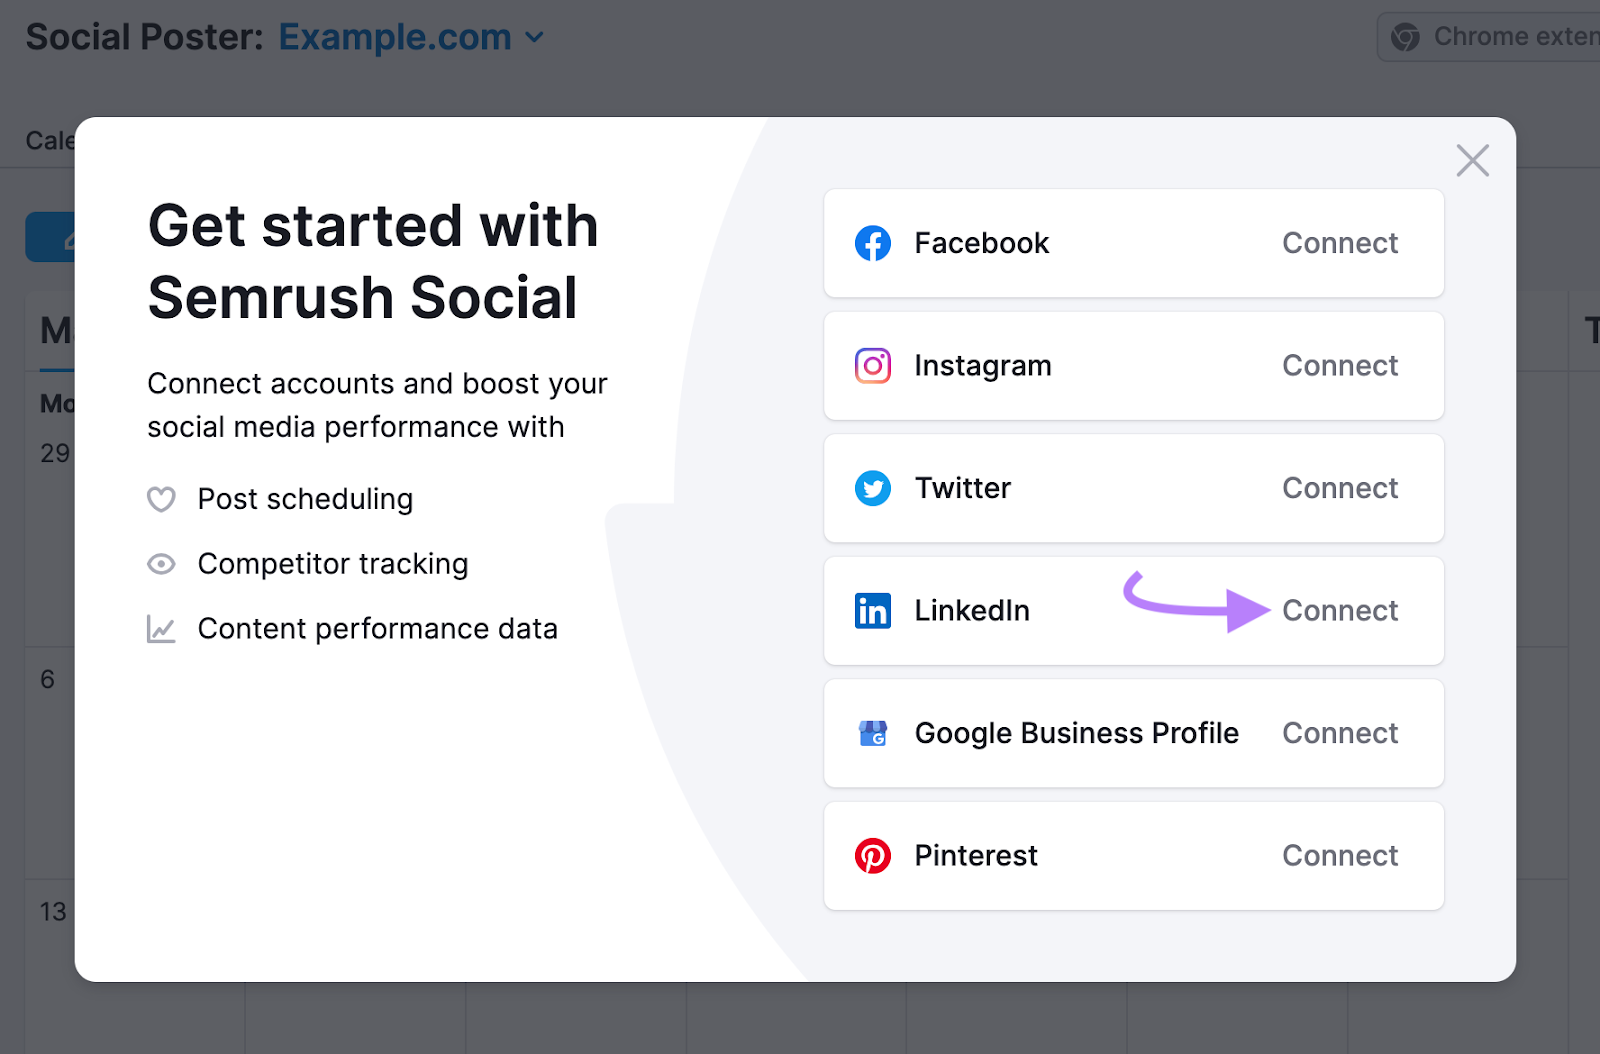
A pop-up will appear, inviting you to get started with Semrush Social.
Click “Connect” beside the LinkedIn option.
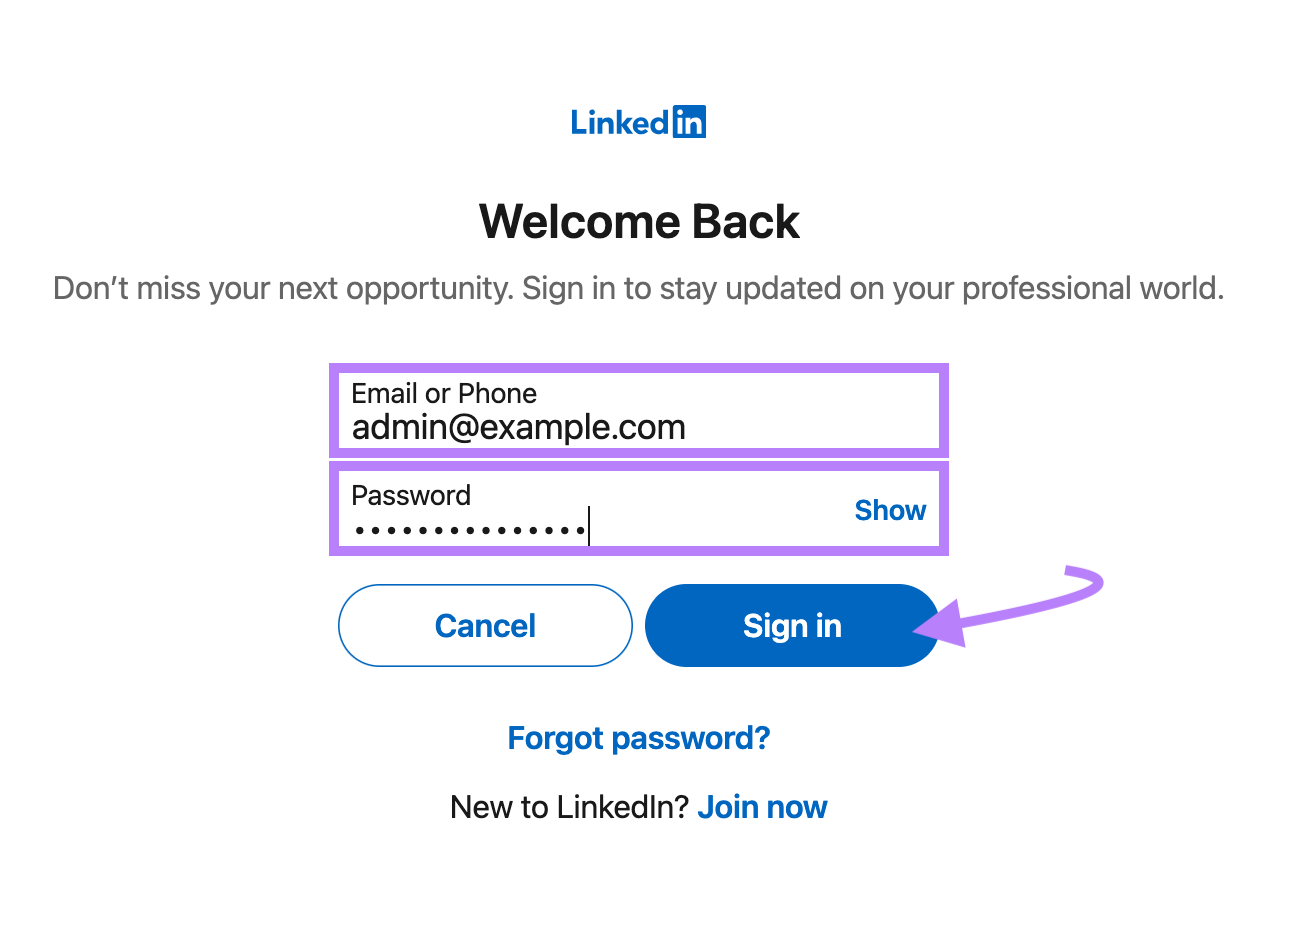
Sign into your LinkedIn account using the resulting pop-up.
Enter the email address or phone number associated with your business’s LinkedIn account, followed by your password. Then, click “Sign in.”
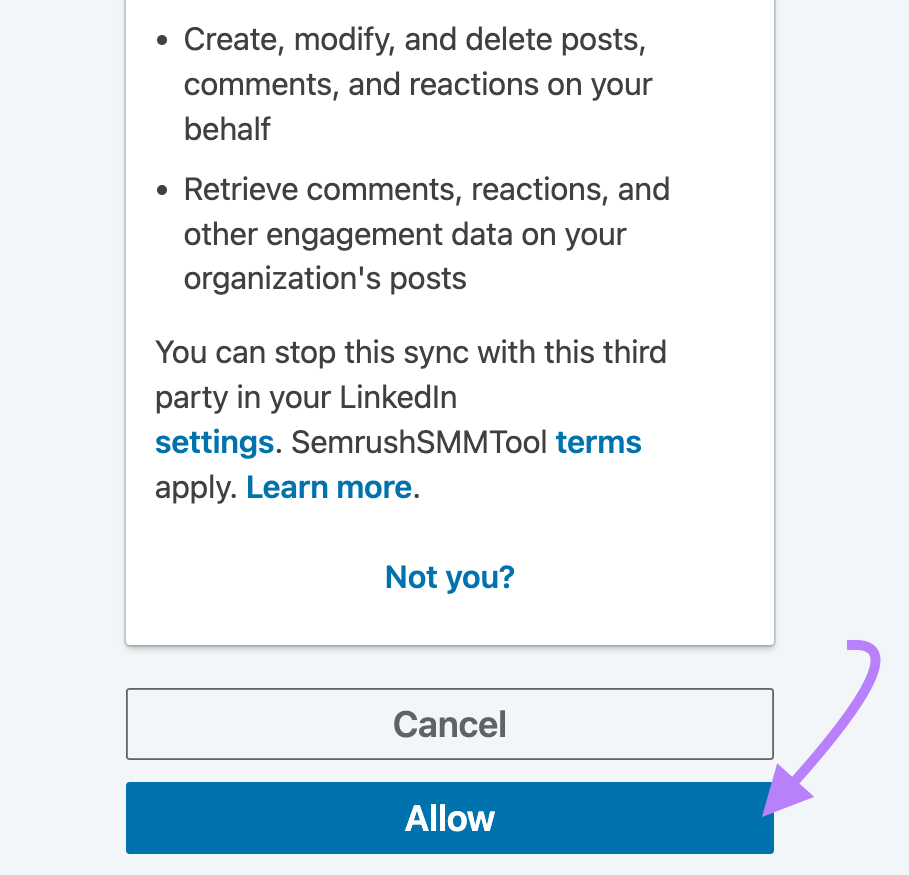
Click “Allow” to give Semrush permission to sync with your LinkedIn account.
If you manage more than one business page, select the pages you want to link and click “Add profiles.”
Click “Continue” to start using Social Analytics.
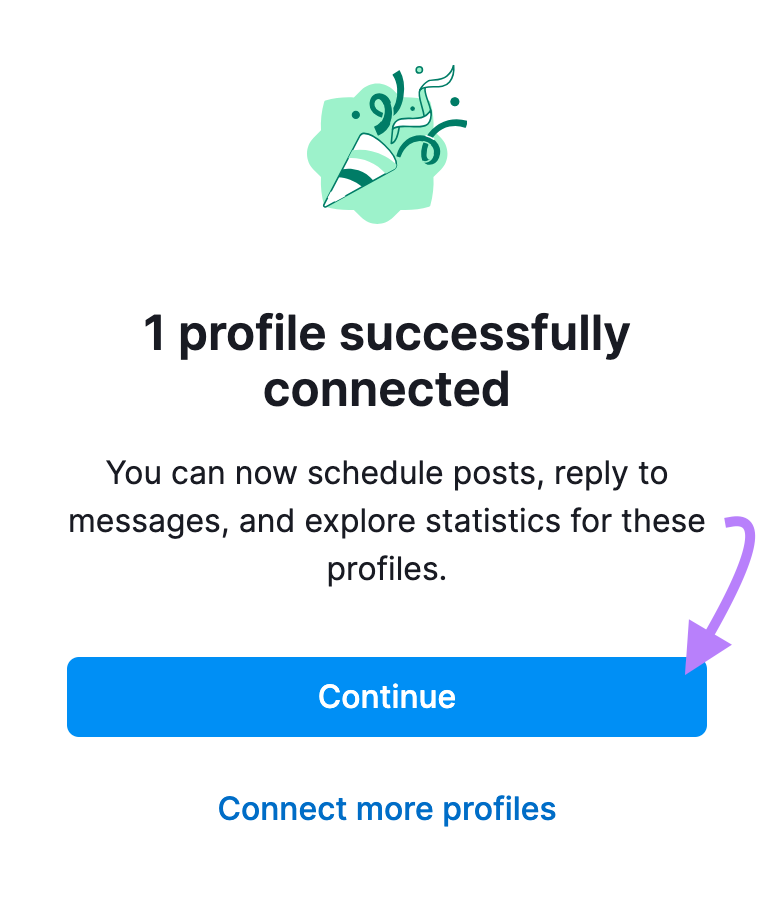
Your LinkedIn account will now appear in your Social Dashboard. Click “Poster” to create and schedule LinkedIn posts. Or, click “Analytics” to view data about your page and posts’ performance.

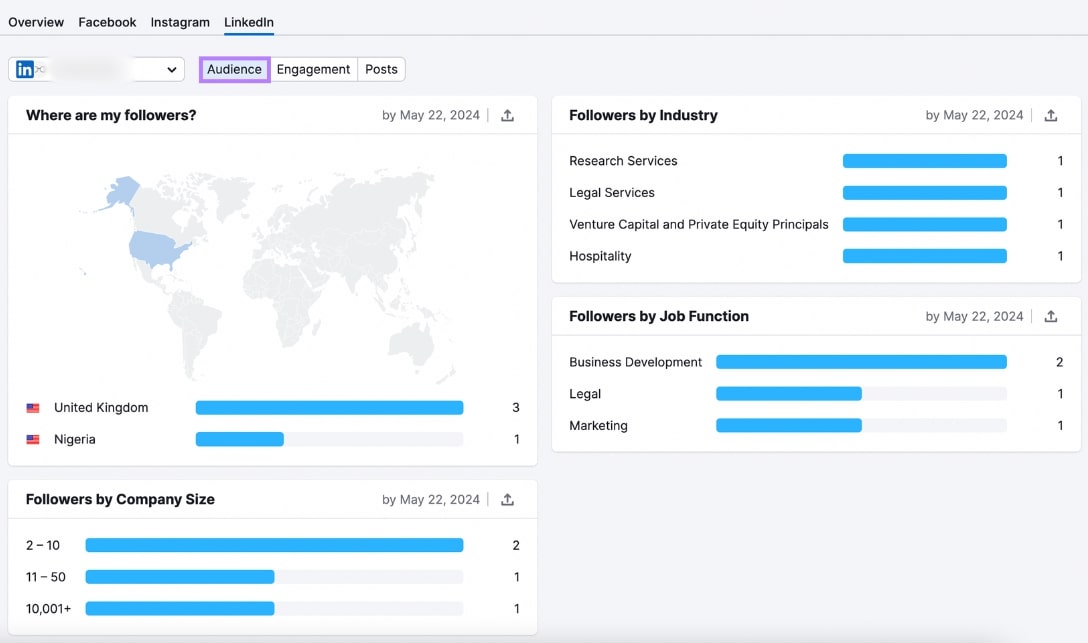
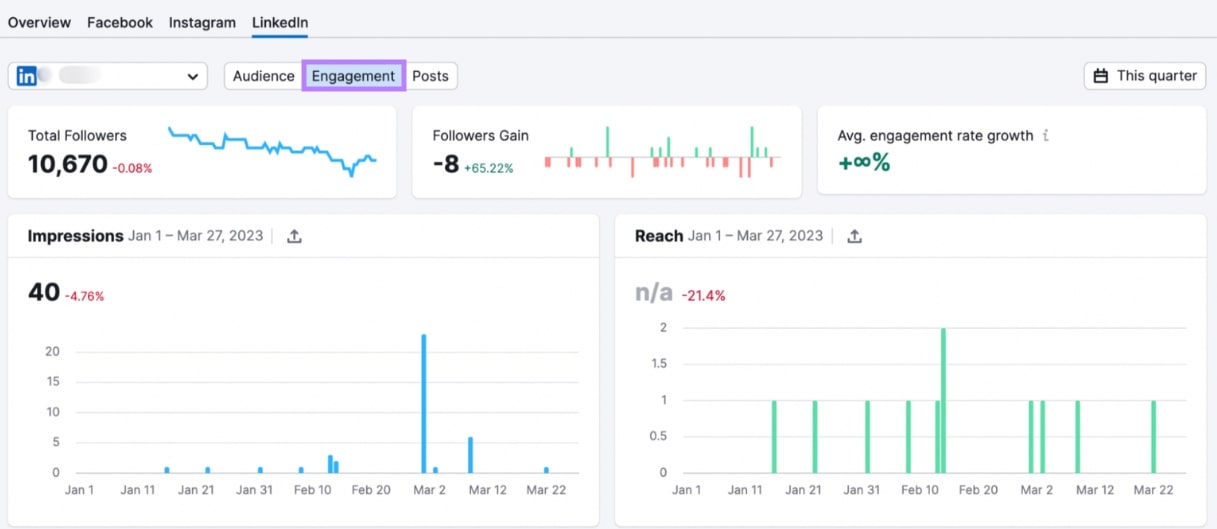
Toggle between the “Audience,” “Engagement,” and “Posts” analytics for your LinkedIn page.
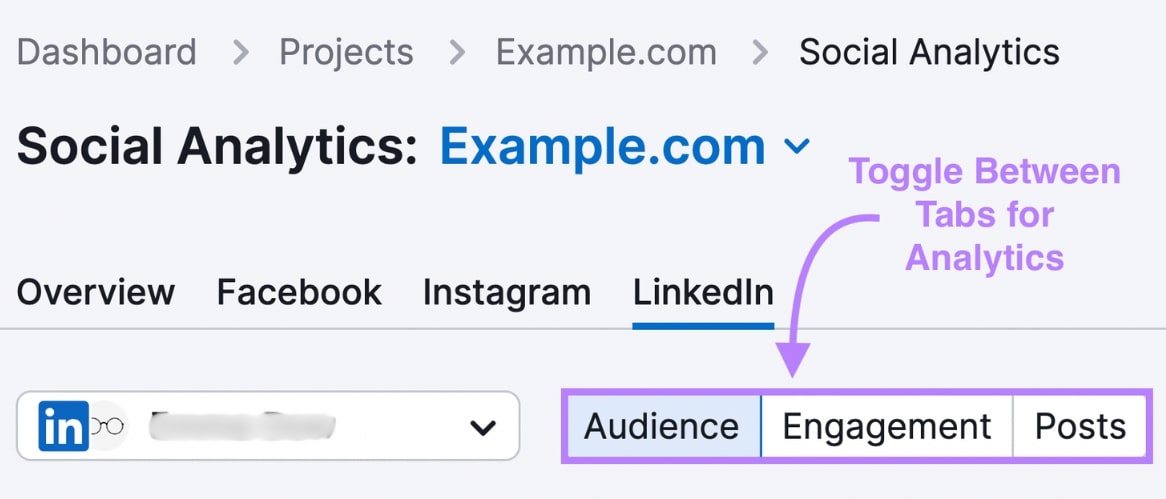

In the “Audience” report, you’ll get insight into your followers’ geographic locations, industries, company sizes, and job functions.
The “Engagement” dashboard provides detailed reporting on your page’s followers, engagement rate, impressions, reach, clicks, reactions, comments, and shares.
Use the “Posts” report to track metrics for individual posts. Track engagement rate, likes, shares, comments, clicks, and impressions.

LinkedIn ads can be a powerful way to grow awareness and increase revenue. However, LinkedIn is just one piece of the social media advertising puzzle.
To make the most of your social media resources, use Semrush Social to track and manage all your social media marketing efforts in one place.
In addition to LinkedIn, Semrush Social currently supports content publishing and performance analytics for the following platforms:
- X (formerly Twitter)
- Google Business Profile
Try out Semrush’s Social Media Toolkit for yourself.
